
When it comes to the Business Intelligence (BI) ecosystem, proprietary tools were the standard for a very long period. Tableau, Power BI, and more recently Looker, were the go-to solutions for enterprise BI use cases. But then, Apache Superset appeared. Hence, the requirement today is to run Apache Superset on AWS. In fact, We have came across various difficulties in setting up the platform on ECS. Therefore, we decided to contribute through sharing the steps.
Without further ado, we will start deploying Apache Superset in AWS ECS using Terraform. It’s worth mentioning that there are other guides on how to deploy it on AWS and that explain how to run Apache Superset in AWS using EC2 instances or AWS CloudFormation.
The points to take into consideration before starting are:
- This deployment is supported in the AWS Regions where Amazon ECS is supported.
- This deployment supports many database management systems to store data that can be visualized through Apache Superset such as Amazon Athena, Amazon Redshift, ClickHouse, MySQL, and PostgreSQL. In our case, we used PostgreSQL.
- You can use the official container image of Apache Superset. In our case, we used a customized one.
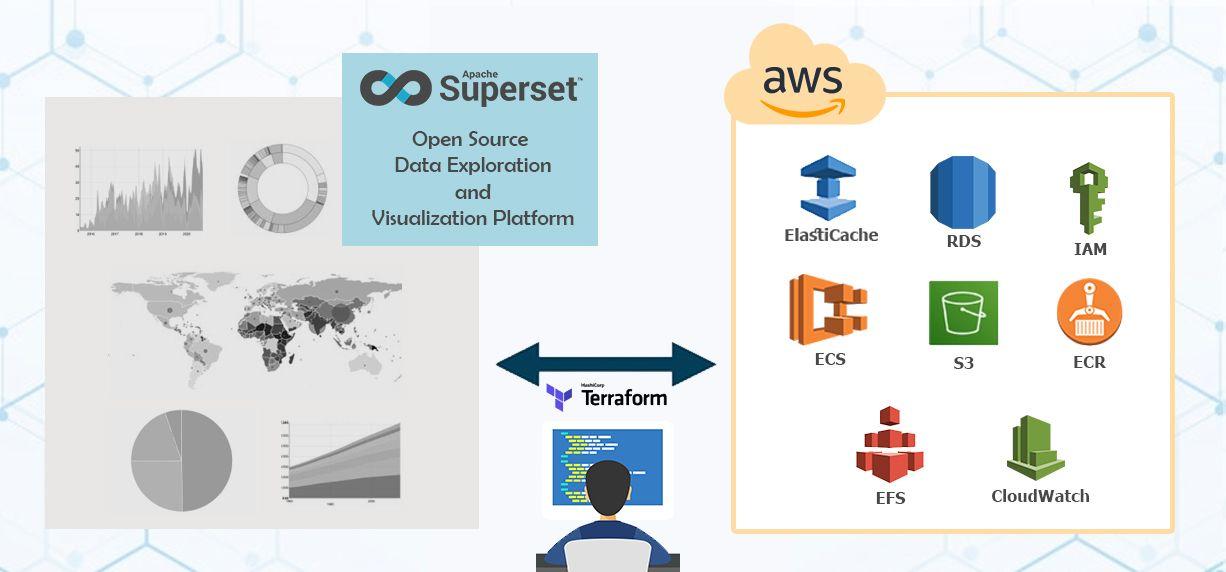
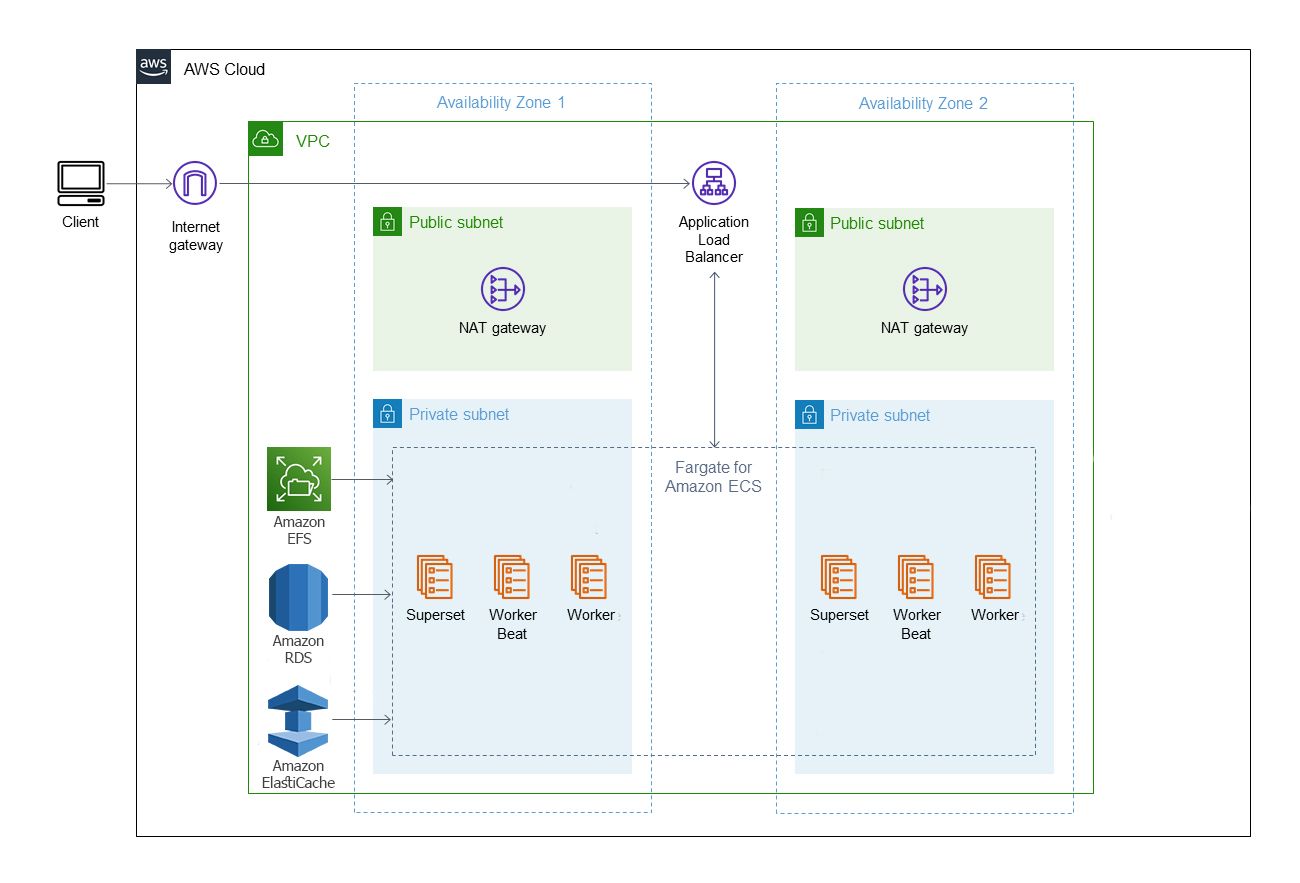
High Level Diagram of the topology
Overview of the Infra and Docker Image
The Docker Image
No matter which platform or cloud you want to run Superset on, if you’re planning for scalability then the first building block should be preparing your custom container image. This will allow you to have Superset containers that match your use-case and it can further be deployed to all sorts of orchestration platforms (like ECS).
In this GitHub repository, you can find the Docker image we used to run Apache Superset on AWS ECS.
Indeed, the starting point of our image is the official Superset image (available on DockerHub). And then, in the Dockerfile the additional dependencies needed for our use-case are being added.
FROM apache/superset

# We switch to root
USER root

ENV TINI_VERSION v0.19.0
RUN curl --show-error --location --output /tini https://github.com/krallin/tini/releases/download/${TINI_VERSION}/tini-amd64
RUN chmod +x /tini

RUN 	curl --silent --show-error https://awscli.amazonaws.com/awscli-exe-linux-x86_64.zip -o /tmp/awscliv2.zip && \
        curl --silent --show-error --location --output /tmp/amazon-ssm-agent.deb https://s3.us-east-1.amazonaws.com/amazon-ssm-us-east-1/latest/debian_amd64/amazon-ssm-agent.deb && \
        unzip /tmp/awscliv2.zip && \
        dpkg -i /tmp/amazon-ssm-agent.deb && \
        ./aws/install && \
        rm -rf /tmp/awscliv2.zip && \
        set -ex \
        && apt-get update \
        && apt-get install -qq -y --no-install-recommends \
        sudo \
        make \
        unzip \
        curl \
        jq \
        && rm -rf /var/lib/apt/lists/* \
        && usermod -aG sudo superset \
        && echo "superset ALL=(ALL) NOPASSWD:ALL" >> /etc/sudoers

# We install the Python interface for Redis
COPY local_requirements.txt .
RUN pip install -r local_requirements.txt

# We add the superset_config.py file to the container
COPY superset_config.py /app/

# We tell Superset where to find it
ENV SUPERSET_CONFIG_PATH /app/superset_config.py
COPY /docker/superset-entrypoint.sh /app/docker/
COPY /docker/docker-bootstrap.sh /app/docker/
COPY /docker/docker-init.sh /app/docker
COPY /docker/docker-entrypoint.sh /app/docker/

# We switch back to the `superset` user
USER superset
ENTRYPOINT ["/tini", "-g", "--","/app/docker/docker-entrypoint.sh"]
Additionally, we have created some other files such as the superset_config.py file which is used to set our custom configuration. Thanks to it, we overidden some values in the Superset’s main config file. Indeed, setting the SUPERSET_CONFIG_PATH environment variable, in the Dockerfile, to the superset_config.py file's path will ensure that our custom configuration is loaded to the container and recognized by Superset.
Moreover, we have the docker-entrypoint.sh file that is used at a first place to export the needed environment variables which are created by concatenating some secrets previously defined within the services definitions. Besides, it is also used to launch the AWS Systems Manager (SSM), which will allow us to securely and remotely manage the configuration of our registred Amazon ECS container instances.
We have also the requirements-local.txt file that is used to specify the needed dependencies to be installed for our dev environment. Those dependencies will be installed using the docker-bootstrap.sh file.
Last but not least, we have the docker-init.sh file that is used to create a superset user.
Testing the image locally
For testing purpose, we created the docker-compose.yml file which is a way to document and configure all of the application's service dependencies. Indeed, our application is composed of multiple services:
- The redis service : It represents the cache of our application. Indeed, it will allow us to decrease data access latency, increase throughput, and ease the load off our database and application. In addition, this service will use the latest stable version of redis image and it will be running on the port 6379.
- The db service : It represents the database of our application created by using the latest stable version of PostgreSQL image and it will be running on the port 5432.
- The superset service : It represents the superset web application created by using the superset image and it will be running on the port 8088.
- The superset-worker service : It represents the celery worker of our application. So, it will create one parent process to manage the running tasks.
- The superset-worker-beat service : It represents the celery worker beat of our application. Indeed, it is a scheduler that sends predefined tasks to the celery worker service at a given time.
Additionally, the docker-compose file depends on other files such as the docker-compose.local.env file ,where we set the different variables needed to run our application , and the docker-bootstrap.sh file, where we specified the different commands to run while starting the containers.
For running the stack for the first time, we are going to use the docker-compose-init.yml file as it has the init_service container to create the required initial user and setting up the database. So,to run the application locally for the first time try to run the following commands:
$ make build_init
$ make up_init
The Infrastructure
-
ECS Cluster: Fargate launch type with the required task definition and the required assume_roles to access other services such as ECR, CloudWatch and KMS. It encompasses three ECS services: the superset-app, the worker and the worker-beat.
-
AWS Secrets Manager: We are using the secrets manager to store the secrets and parameters
-
ECR: For hosting the docker image that we are going to build in a few seconds!
-
ElastiCache: No matter which database you want to connect Superset to, if you’re planning on running it at scale then you definitely don’t want it to run multiple queries each time someone opens a dashboard. So, we’ll be using Amazon ElastiCache for Redis with the required configuration to be accessible by the three containers.
-
RDS for PostgreSQL: We are using it to store our data with the required configuration to be accessible by the worker and superset app containers.
-
EFS: to provide metadata, query cached-data persistency, and share service modules.
The Infra Repository
- We created a GitHub repository containing the infrastructure necessary for our deployment. This repository is structured based on Terraform standard modules structure.
- Covering VPC creation is not part of the article scope, but if you are looking for managing VPC via terraform, you can check this example.
- An example of how to call the module could be found on the README.md
- All resources' names are being prefixed by the provided prefix variable you provide while calling the module.
Let’s start the deployment

After the long introduction and overview of the resources, let’s start to get things done! Our first step is to build the image using the Dockerfile hosted on the repo, we can do this by running the below command, the docker image will be tagged as superset_ecs:prd.
$ docker build -t superset_ecs:prd .
Please note the task-definition used by the Superset module is referencing the tag name provided by common_tags[“env”] variable, which is defaulted to prd, below is the snippet for more clarification
"INSTANCE_NAME"  : "${var.app_ecs_params["container_name"]}",
"image": "${var.ecr_repository_url}:${var.common_tags["env"]}",
"name": "${var.app_ecs_params["container_name"]}",
"readonlyRootFilesystem": false,
"networkMode": "awsvpc",
"command": [
  "/app/docker/docker-bootstrap.sh", "app-gunicorn"
],
Once the image is built, we will switch to our terraform repo and execute terraform apply. Just be aware in prior to running the plan, you should define the required variables mentioned within the example in the README.md file.
Once you are satisfied with the terraform plan and getting a clean one you can proceed with the terraform apply. This module will prepare your AWS infrastructure with the required resources such as ECS Cluster, RDS database, ElastiCache for Redis,EFS file system, ECR repository which will be used to publish our local image to, S3 bucket for logging and KMS Key.
Please refer to the below steps to upload local image to ECR.
aws ecr get-login-password --region <region_name> | docker login --username AWS --password-stdin <AWS_ACCOUNT_ID>.dkr.ecr.us-east-1.amazonaws.com

docker tag superset_ecs:prd <AWS_ACCOUNT_ID>.dkr.ecr.us-east-1.amazonaws.com/prd-superset-useast1:latest

docker push <AWS_ACCOUNT_ID>.dkr.ecr.us-east-1.amazonaws.com/prd-superset-useast1:latest
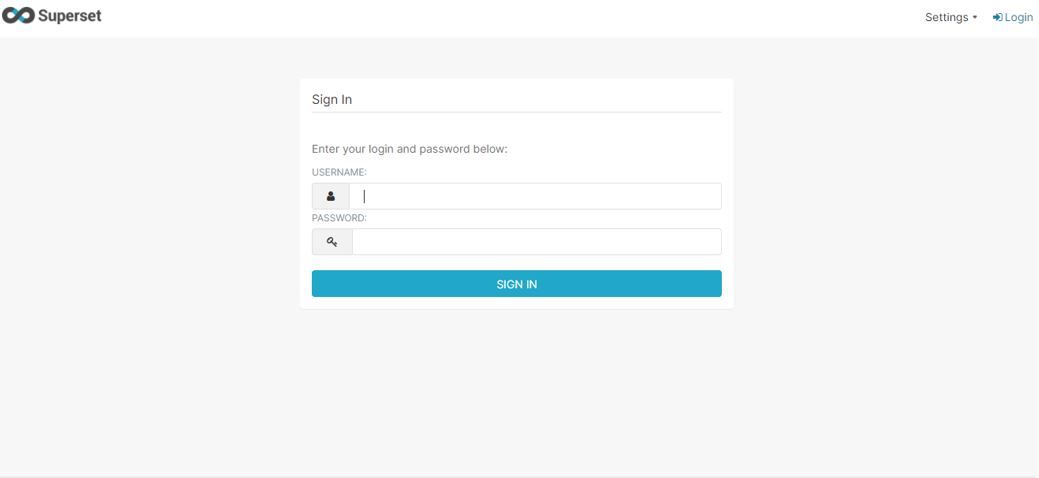
Having said this, it’s now the time to use the superset tool. This can be done by logging using your preconfigured username and password.
Conclusion
To conclude, you can now create your first visualization of any data. It is better to refer to some of templated dashboards and to watch different videos and manuals. Also, the platform can be personalized with your retailer or ecommerce name and logo.
I hope this has been informative, feel free to submit your comments, we will be more than happy to answer your inquiries.