

In this blog, I cover the main concepts behind Apache Airflow and illustrate a step-by-step tutorial with examples on how to make Airflow work better for you.
Table of contents
- What is Airflow? - Use cases
- Basic Airflow concepts
- Distributed Apache Airflow Architecture
- Installation and Setup
What is Airflow
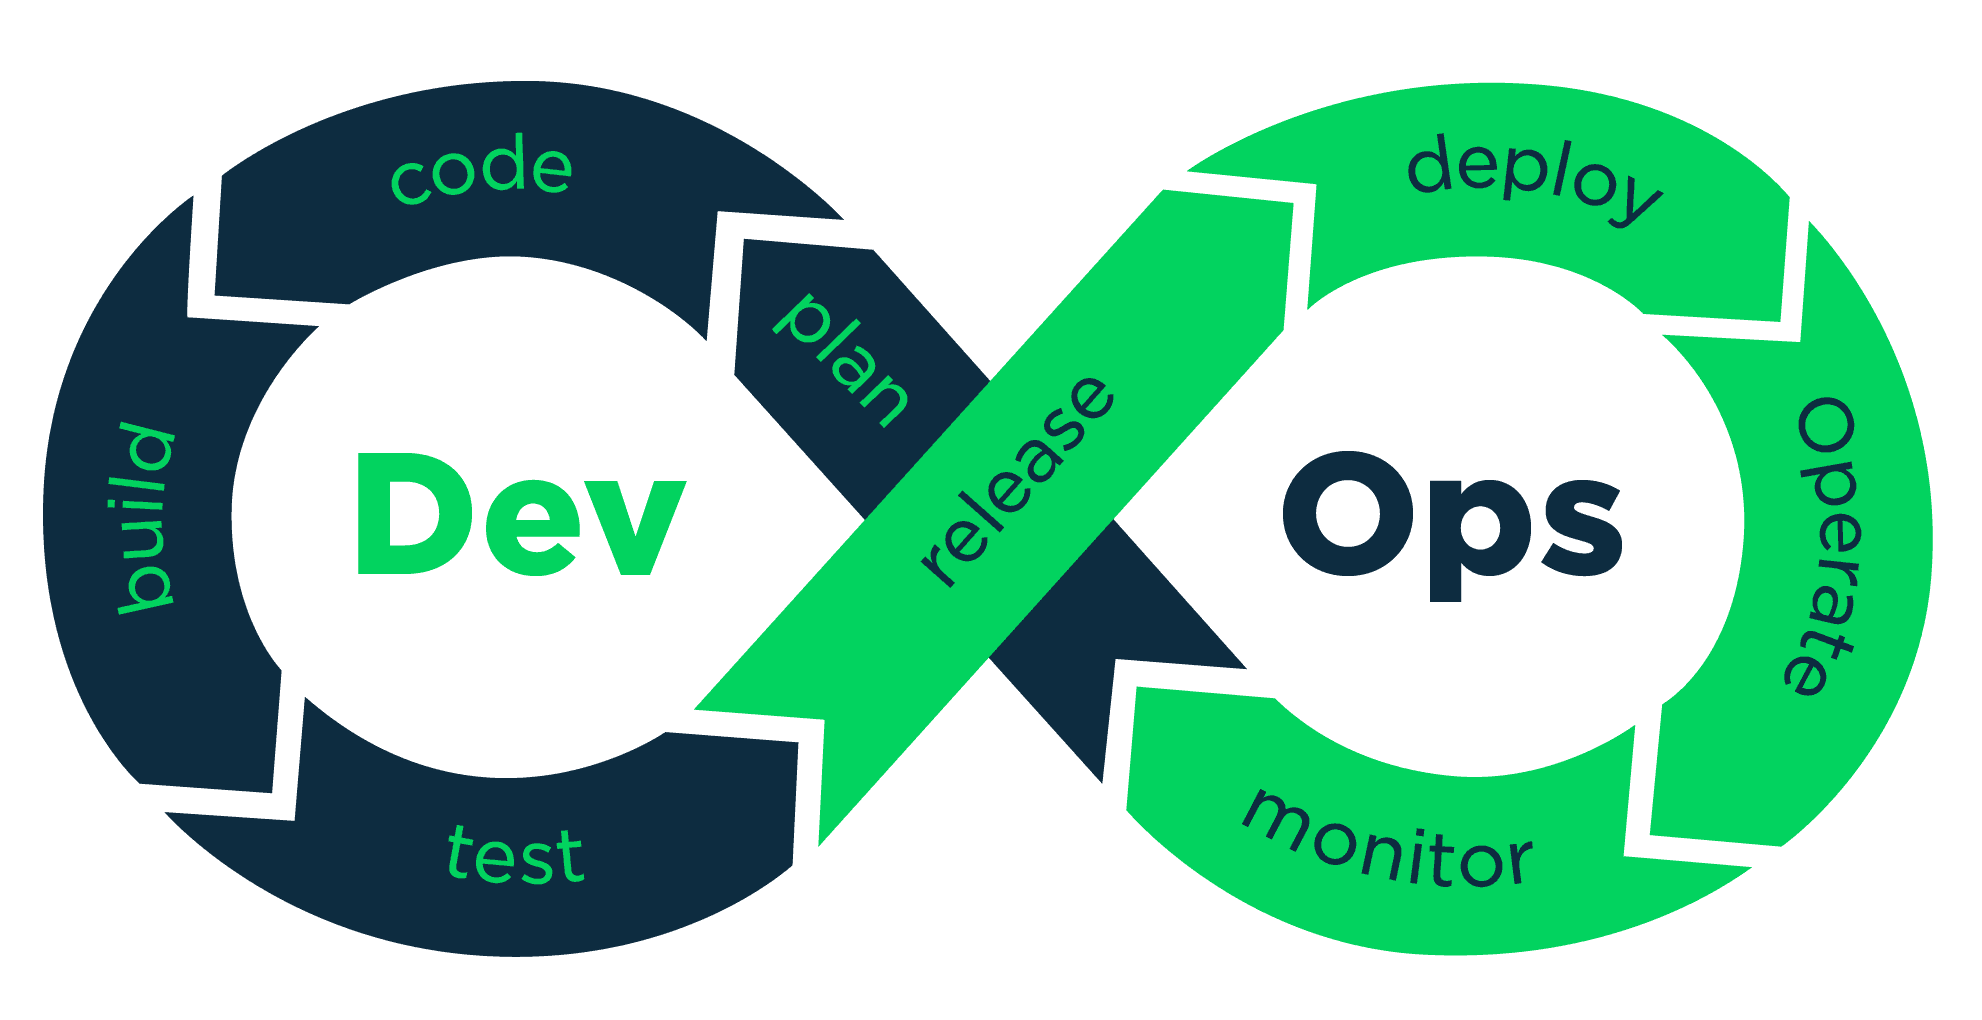
Airflow is a workflow management platform that programmaticaly allows you to author, schedule, monitor and maintain workflows with an easy UI. There are numerous resources on what Airflow does, but it’s much easier to understand with a working example.
Here are a few reasons to use Airflow:
- Open source: After initiating as an internal Airbnb project, Airflow had a very natural need in the community. This is one of the main reasons why this project was adopted and managed by Apache foundation.
- Web Interface: Airflow ships with a Flask app that tracks all the defined workflows, and allows you to easily start, stop, change workflows.
- Python Based: Every part of the configuration is written in Python, including configuration of schedules and the scripts to run them.
Example of use cases suitable for Airflow:
- ETL (extract, transform, load) jobs - extracting data from multiple sources, transforming for analysis and loading it into a data store
- Machine Learning pipelines
- Data warehousing
- Orchestrating automated testing
- Performing backups.
It is generally best suited for regular operations which can be scheduled to run at specific times.
Airflow concepts
Dag
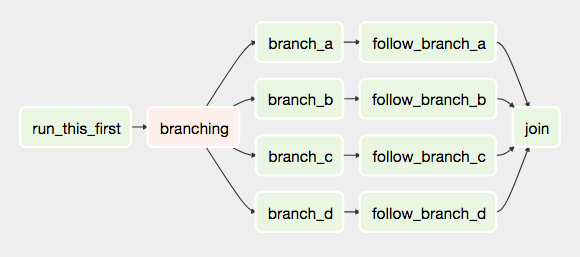
An Airflow workflow is designed as a directed acyclic graph (DAG). Directed means the tasks are executed in some order. Acyclic- as you cannot create loops (i.e. cycles). A graph- it’s a very convenient way to view the process. So, the DAGs describe how to run tasks. DAGs are defined in Python files that are placed in Airflow’s DAG_FOLDER. There can be as many DAGs as you need. Although each one can mention multiple tasks, it’s a good idea to keep one logical workflow in one file.
Operators-Sensors
In Airflow all workflows are DAGs. A Dag consists of operators. An operator defines an individual task that needs to be performed. There are different types of operators available(As given on Airflow Website) :
- BashOperator - executes a bash command
- PythonOperator - calls an arbitrary Python function
- EmailOperator - sends an email
- SimpleHttpOperator - sends an HTTP request
- MySqlOperator, SqliteOperator, PostgresOperator, MsSqlOperator, OracleOperator, JdbcOperator, etc. - executes a SQL command
- Sensor - waits for a certain time, file, database row, S3 key, etc… You can also come up with a custom operator as per your need.
Tasks
Operators refer to tasks that they execute. In fact a task is the instance of the operator,like:
energy_operator = PythonOperator(
    task_id='print_date',
    python_callable=myfunc(),
    dag=dag)
Here the energy_operator is an instance of PythonOperator that has been assigned a task_id, a python_callable function and some DAG to be a part of it.
Note: Don’t confuse operators with tasks. Tasks are defined as “what to run?” and operators are “how to run”. For example, a Python function to read from S3 and push to a database is a task. The method that calls this Python function in Airflow is the operator.
So to summarize: a DAG consists of tasks, which are parameterized representations of operators. Each time the DAG is executed a DagRun is created which holds all TaskInstances made from tasks for this run.
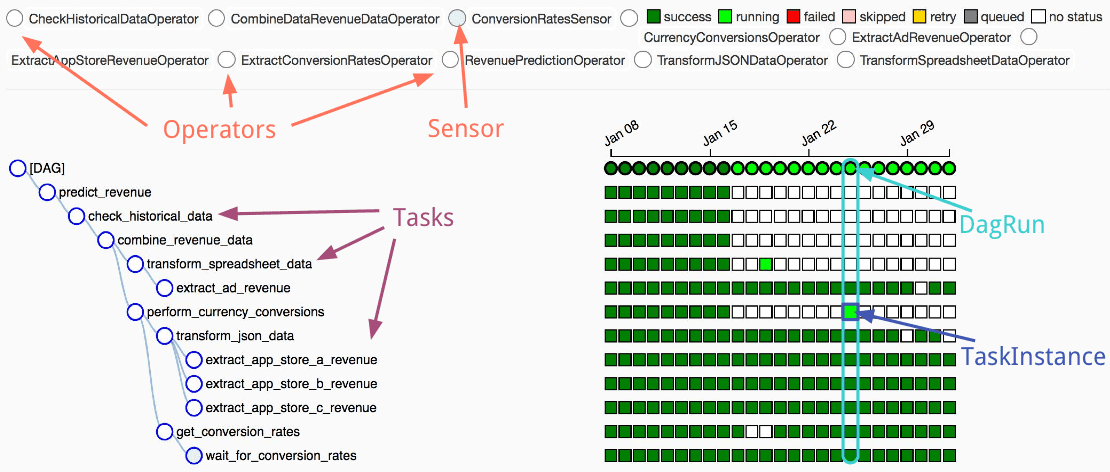
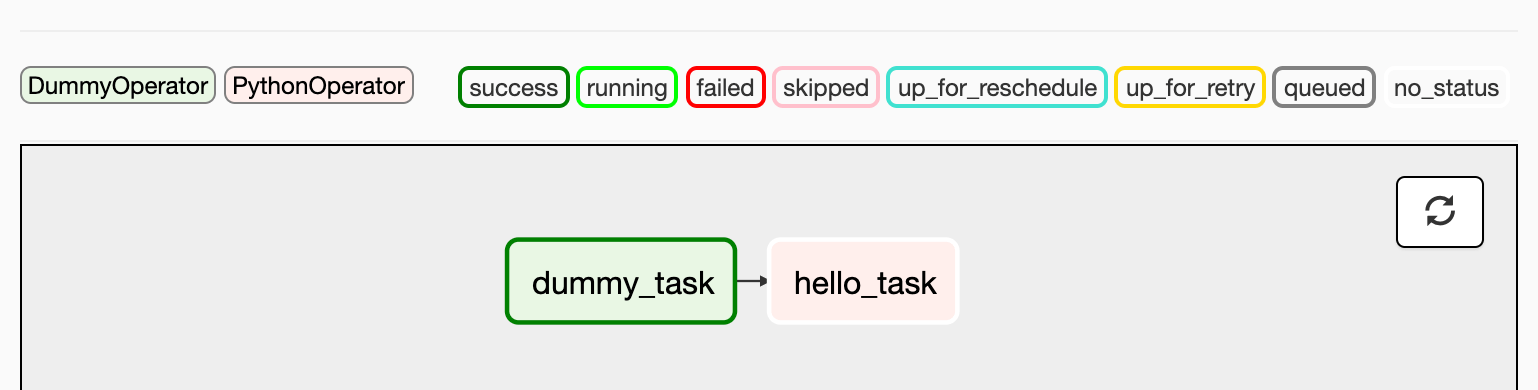
Above is an example of the UI showing a DAG, all the operators (upper-left) used to generate tasks (lower-left) and the TaskInstance runs inside DagRuns (lower-right). White box - task not run, light green - task running, dark green - task completed successfully.
In addition to the core Airflow objects, there are a number of more complex features that enable behaviors like limiting simultaneous access to resources, cross-communication, conditional execution, and more. see link
Distributed Apache Airflow Architecture
In Apache Airflow, tasks are performed by an executor. The main types of executors are:
- Sequential Executor: Each job is performed locally (on the same machine as the scheduler). They are executed sequentially, which means that only one task can be performed at a time.
- Local Executor: similar to the sequential executor, except that multiple tasks can be performed in parallel.
- Celery Executor: The workload is spread over several celery workers who can operate on different machines.
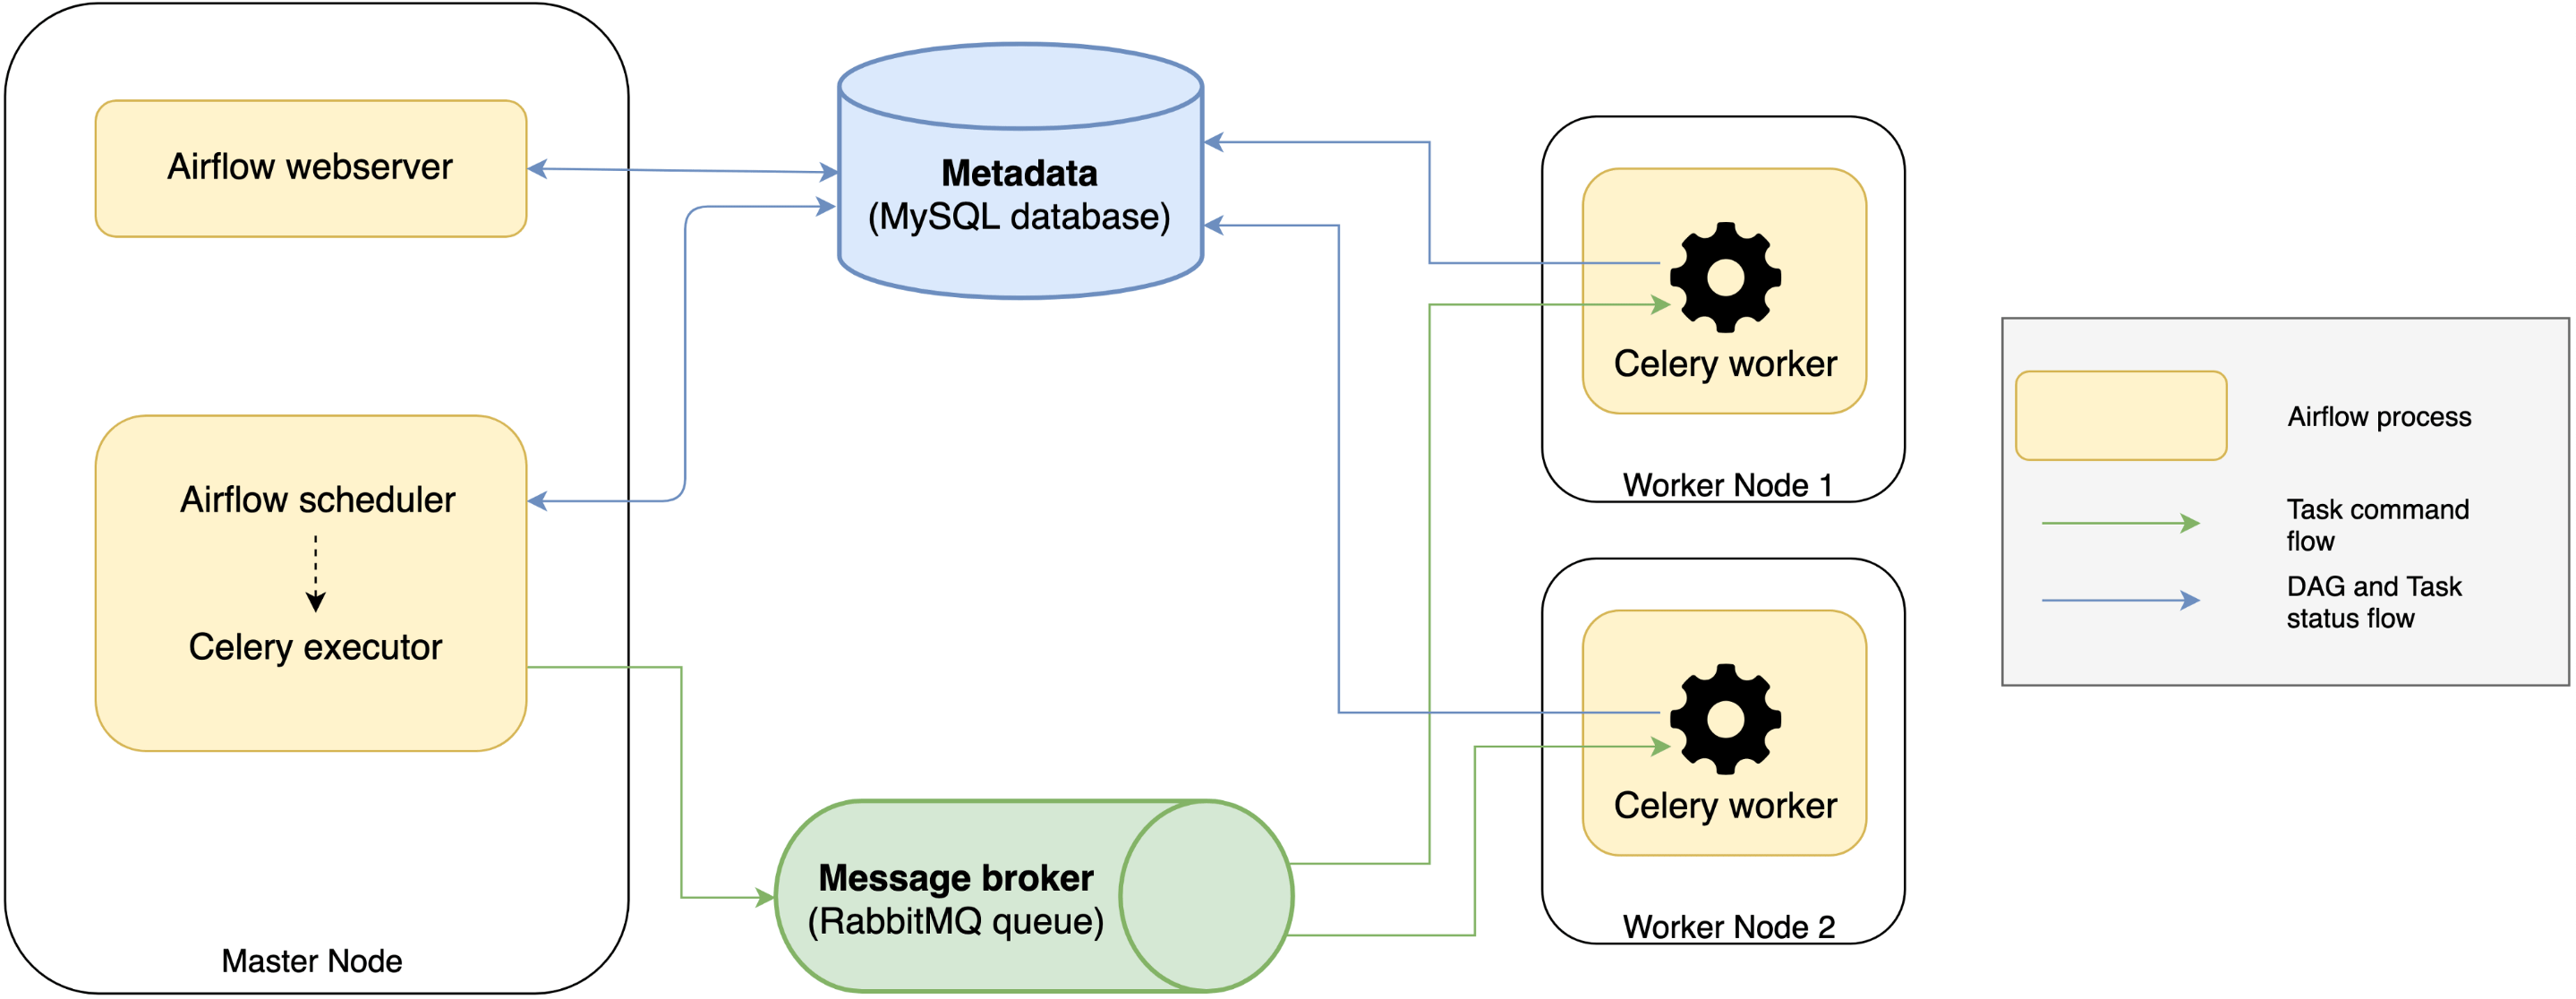
Apache Airflow is structured into different processes that operate independently of each other.
- Web server : The GUI. (web interface ) to query the metadata to monitor,execute and track the status of your jobs.
- Scheduler : This component checks the status of the DAGs and tasks in the metadata database ,sends them to the queues and decide what tasks need to be run, when and where.
- Metadata database: This component stores the states of airflow objects (DAG execution and task instances...). All processes read and write from here.
- Executor: The mechanism that performs the tasks by retrieving orders from queues,executing them and updating metadata.
In the end, a typical architecture looks like:
Installation and Setup
Airflow is Python based ,supported on 3 and 2 as well. The best way to install it is via pip tool.
- Install
Airflow home lives in ~/airflow by default, but you can change the location before installing airflow.
You first need to set the AIRFLOW_HOME environment variable and then install airflow.
$ export AIRFLOW_HOME=~/airflow
$ pip install apache-airflow
To verify whether it got installed, run the command: airflow version and it should print something like:
[2019-12-12 23:07:41,716] {__init__.py:51} INFO - Using executor SequentialExecutor
  ____________       _____________
 ____    |__( )_________  __/__  /________      __
____  /| |_  /__  ___/_  /_ __  /_  __ \_ | /| / /
___  ___ |  / _  /   _  __/ _  / / /_/ /_ |/ |/ /
 _/_/  |_/_/  /_/    /_/    /_/  \____/____/|__/  v1.10.4
once you have completed the installation you should see something like this in the airflow directory (wherever it lives for you)
airflow_home
├── airflow.cfg
└── unittests.cfg
We need to create a local dag folder:
$ mkdir ~/airflow/dags
As your project evolves, your directory will look something like this:
airflow                  # the root directory.
├── dags                 # root folder for all dags. files inside folders are not searched for dags.
│   ├── my_dag.py, # my dag (definitions of tasks/operators) including precedence.
│   └── ...
├── logs                 # logs for the various tasks that are run
│   └── my_dag           # DAG specific logs
│   │   ├── src1_s3      # folder for task-specific logs (log files are created by date of a run)
├── airflow.db           # SQLite database used by Airflow internally to track the status of each DAG.
├── airflow.cfg          # global configuration for Airflow (this can be overridden by config inside the file.)
└── ...
- Prepare your database
After that. As mentioned above, Airflow uses a database to keep track of tasks and their status. The default database used is sqlite
notice that you can change default parameters databases, executors... in your local configuration file
~/airflow/airflow.cfgFor now, just stick with basic settings.
Now we can initialize the database and start the web server with this commands
$ airflow initdb
$ airflow webserver -p 8080
You can now visit the Airflow UI by navigating your browser to port 8080 on the host where Airflow was started, for example: [http://localhost:8080/admin/]

and you will see that there are a number of examples DAGS already there.
These are the example shipped with the Airflow installation. You can turn them off by visiting airflow.cfg file and set load_examples = False
- Writing your first DAG
Let’s create our first simple DAG. Inside the dag directory ~/airflow/dags create a simple_dag.py file.
from airflow import DAG
from airflow.operators.dummy_operator import DummyOperator
from airflow.operators.python_operator import PythonOperator


def print_hello():
    return "Hello world!"


default_args = {
    "owner": "airflow",
    "depends_on_past": False,
    "start_date": datetime(2019, 4, 30),
    "email": ["[email protected]"],
    "email_on_failure": False,
    "email_on_retry": False,
    "retries": 1,
    "retry_delay": timedelta(minutes=2),
}

dag = DAG(
    "hello_world",
    description="Simple tutorial DAG",
    schedule_interval="0 12 * * *",
    default_args=default_args,
    catchup=False,
)

t1 = DummyOperator(task_id="dummy_task", retries=3, dag=dag)

t2 = PythonOperator(task_id="hello_task", python_callable=print_hello, dag=dag)

# sets downstream foe t1
t1 >> t2
- Running your DAG
In order to run your DAG, open a second terminal and start the Airflow scheduler by issuing the following commands:
$ airflow scheduler
The scheduler will send tasks for execution. The default Airflow settings rely on an executor named SequentialExecutor, which is started automatically by the scheduler. In production you would probably want to use a more robust executor, such as the CeleryExecutor. When you reload the Airflow UI in your browser, you should see your hello_world DAG listed in Airflow UI.

In order to start a DAG Run, first turn the workflow on, then click the Trigger Dag button on the right and finally, click on the Graph View to see the progress of the run.
Check out Airflow with Docker and the deploiment on AWS ECS using Terraform:
github.com/aitsim/airflow-infra
That is the most important thing. I hope this article has been useful for you to understand the concepts of airflow. Have fun developing your own workflows. Thank You :)