Native mobile development concepts for React Native developers (part 2)

Welcome to the second and last part of Native mobile development concepts for React Native developers, I hope you are ready for the rest of your walk of atonement because we are not done yet.
In the last part we introduced some basic knowledge that every mobile developer needs to know about Android development. The natural sequel of that is introducing concepts about iOS development.
Xcode
When I first started working with React Native, I found the Xcode user interface very confusing, and I couldn't decide which parts concern me as React Native developer, so let's take a look at Xcode.
We are not going to go into details about every feature in Xcode, but we will go through the parts that you will definitely work with as a React Native developer.
To open your project in Xcode, you need to open the .xcworkspace file in iOS folder, not the .xcodeproj file, the difference between the two is that the .xcworkspace file contains all the dependencies of your project, while the .xcodeproj file contains only the project itself.
As soon as you open your project in Xcode, you will see this interface:
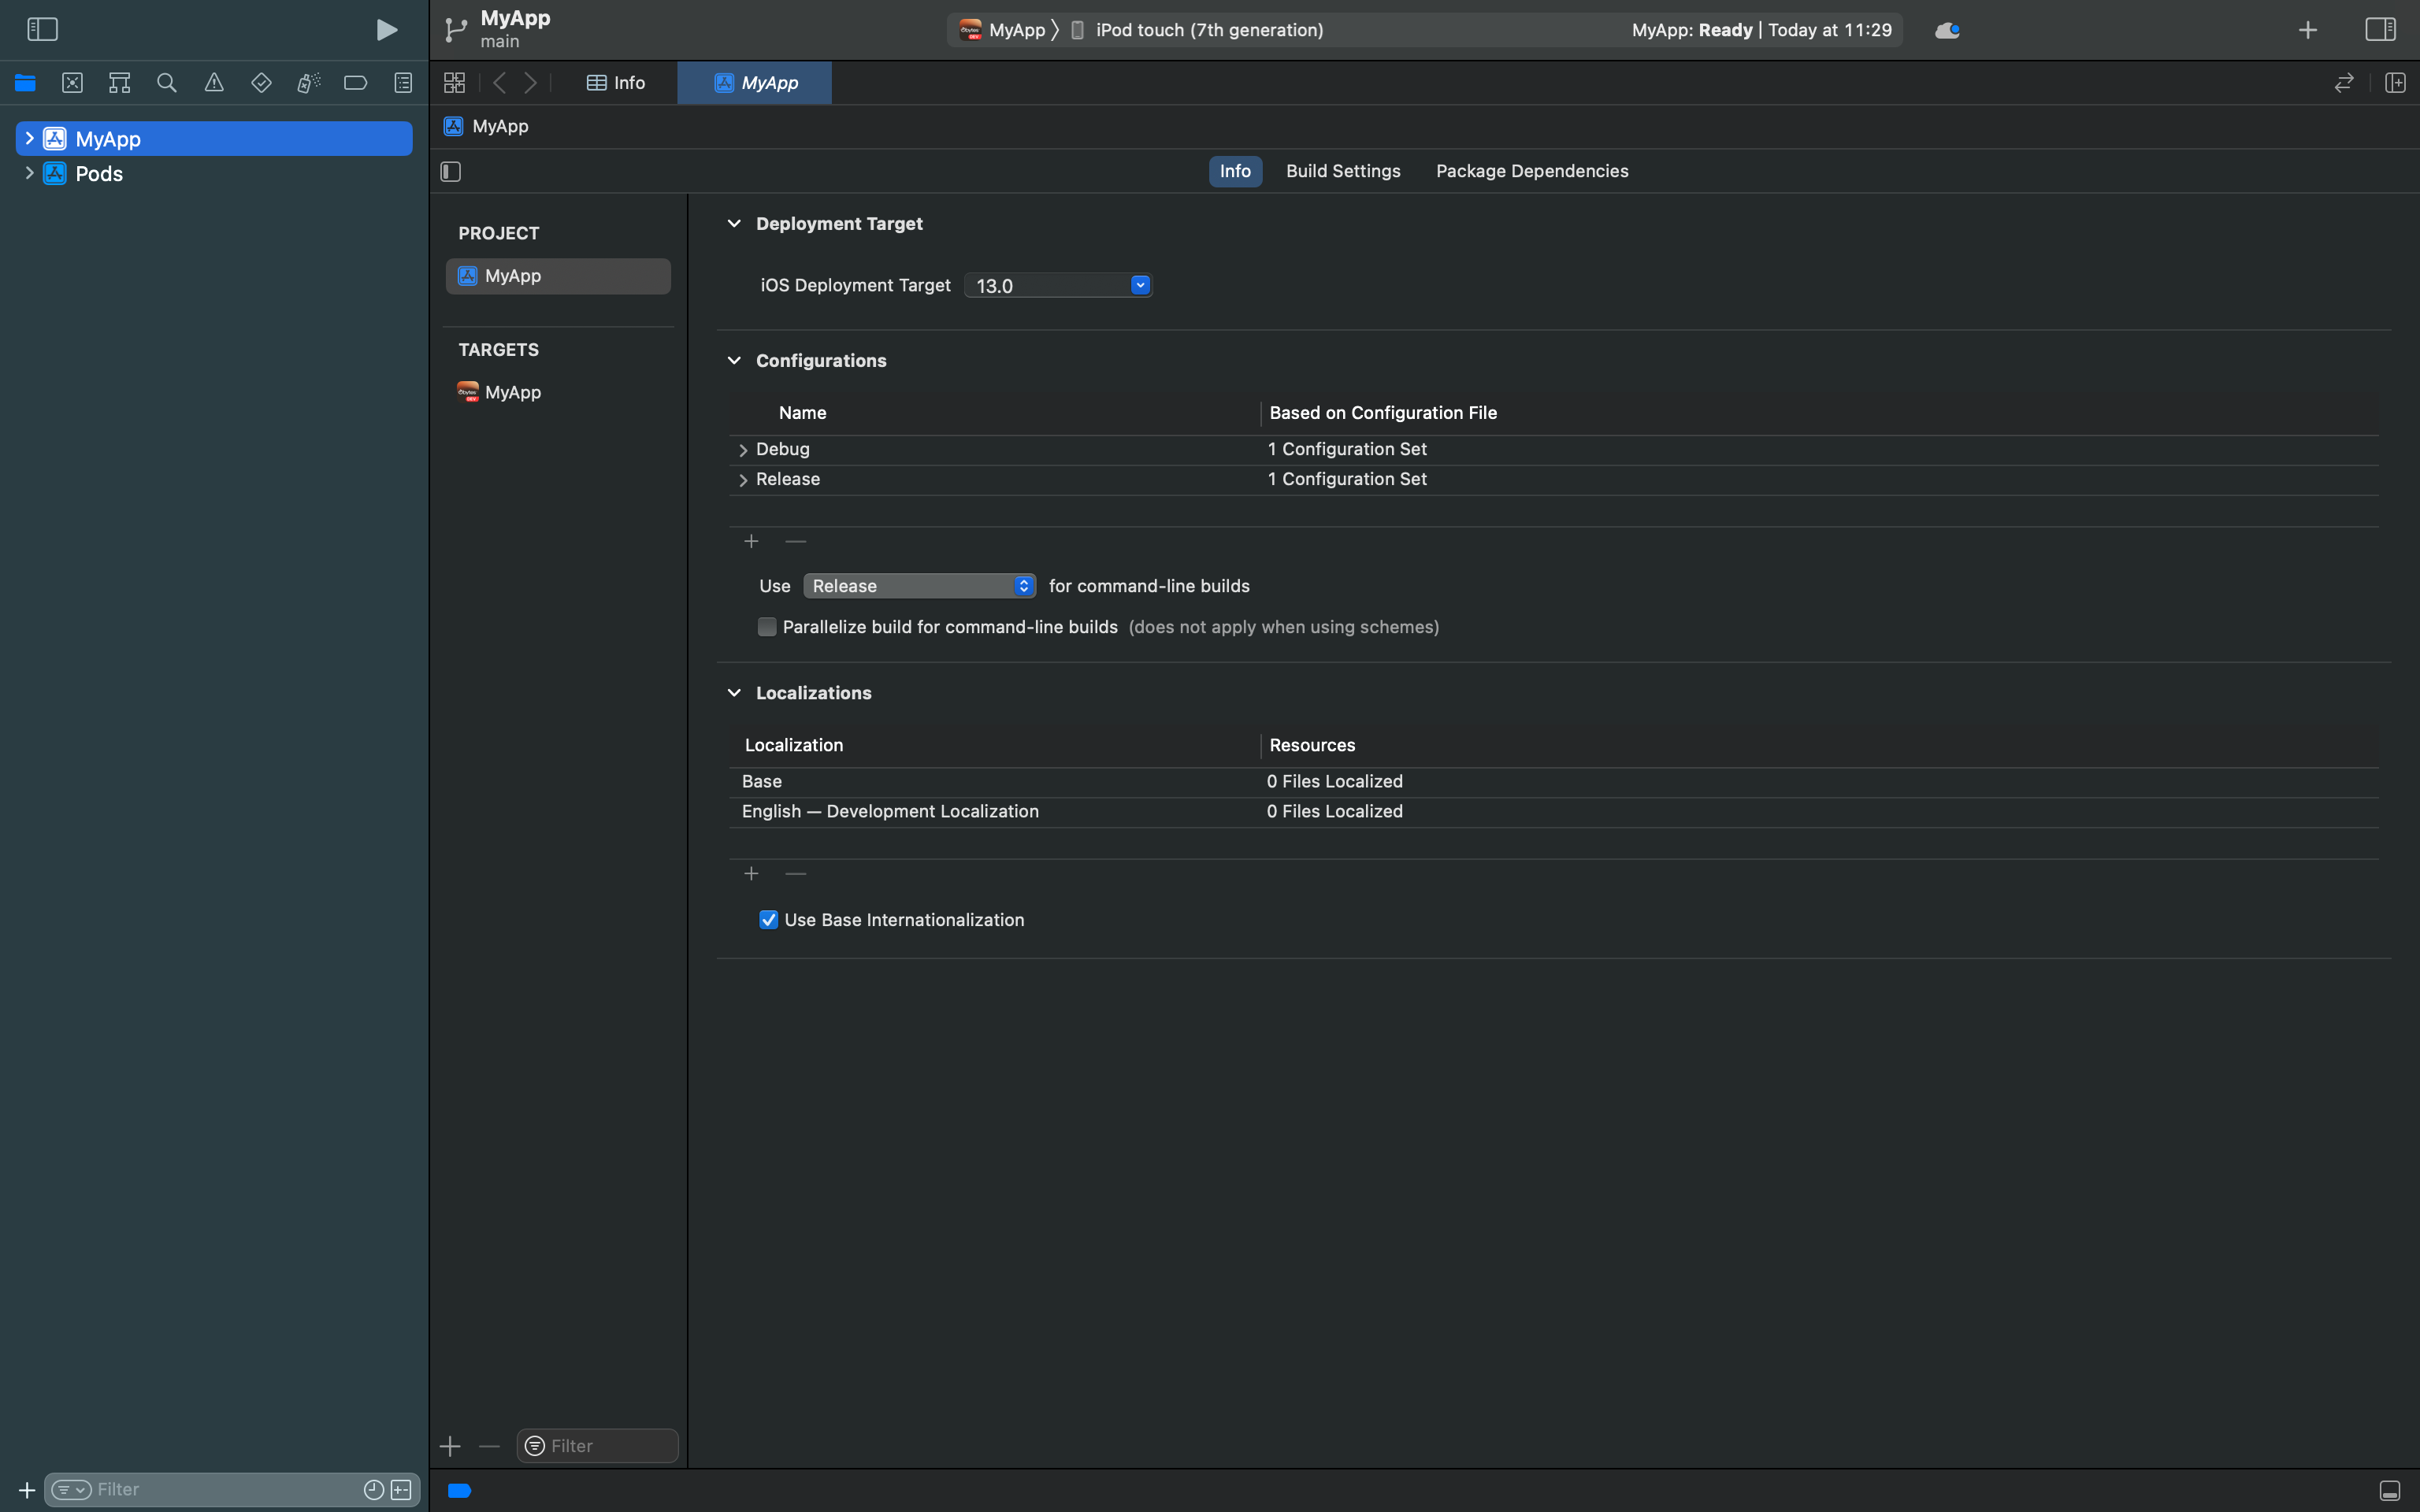
You can see your file structure on the left, and the main interface on the right.
In the Info tab, we notice some fields with default values. Let's go through what some of these values mean.
- Deployment target
deployment target is the minimum version of the operating system that your app supports. For example, if you set the deployment target to iOS 13.0, your app will not run on devices running iOS 12.0 or earlier. We can say it is the equivalent of the minSdkVersion in Android.
- Configurations
Configurations are a set of build settings that define how Xcode builds your app. You can have multiple configurations, each with its own settings and build phases, to build different products or build variations of the same product.
Debug and release are the two most common configurations, debug is used when developing your app, while release build optimize your app to make it more suitable for production.
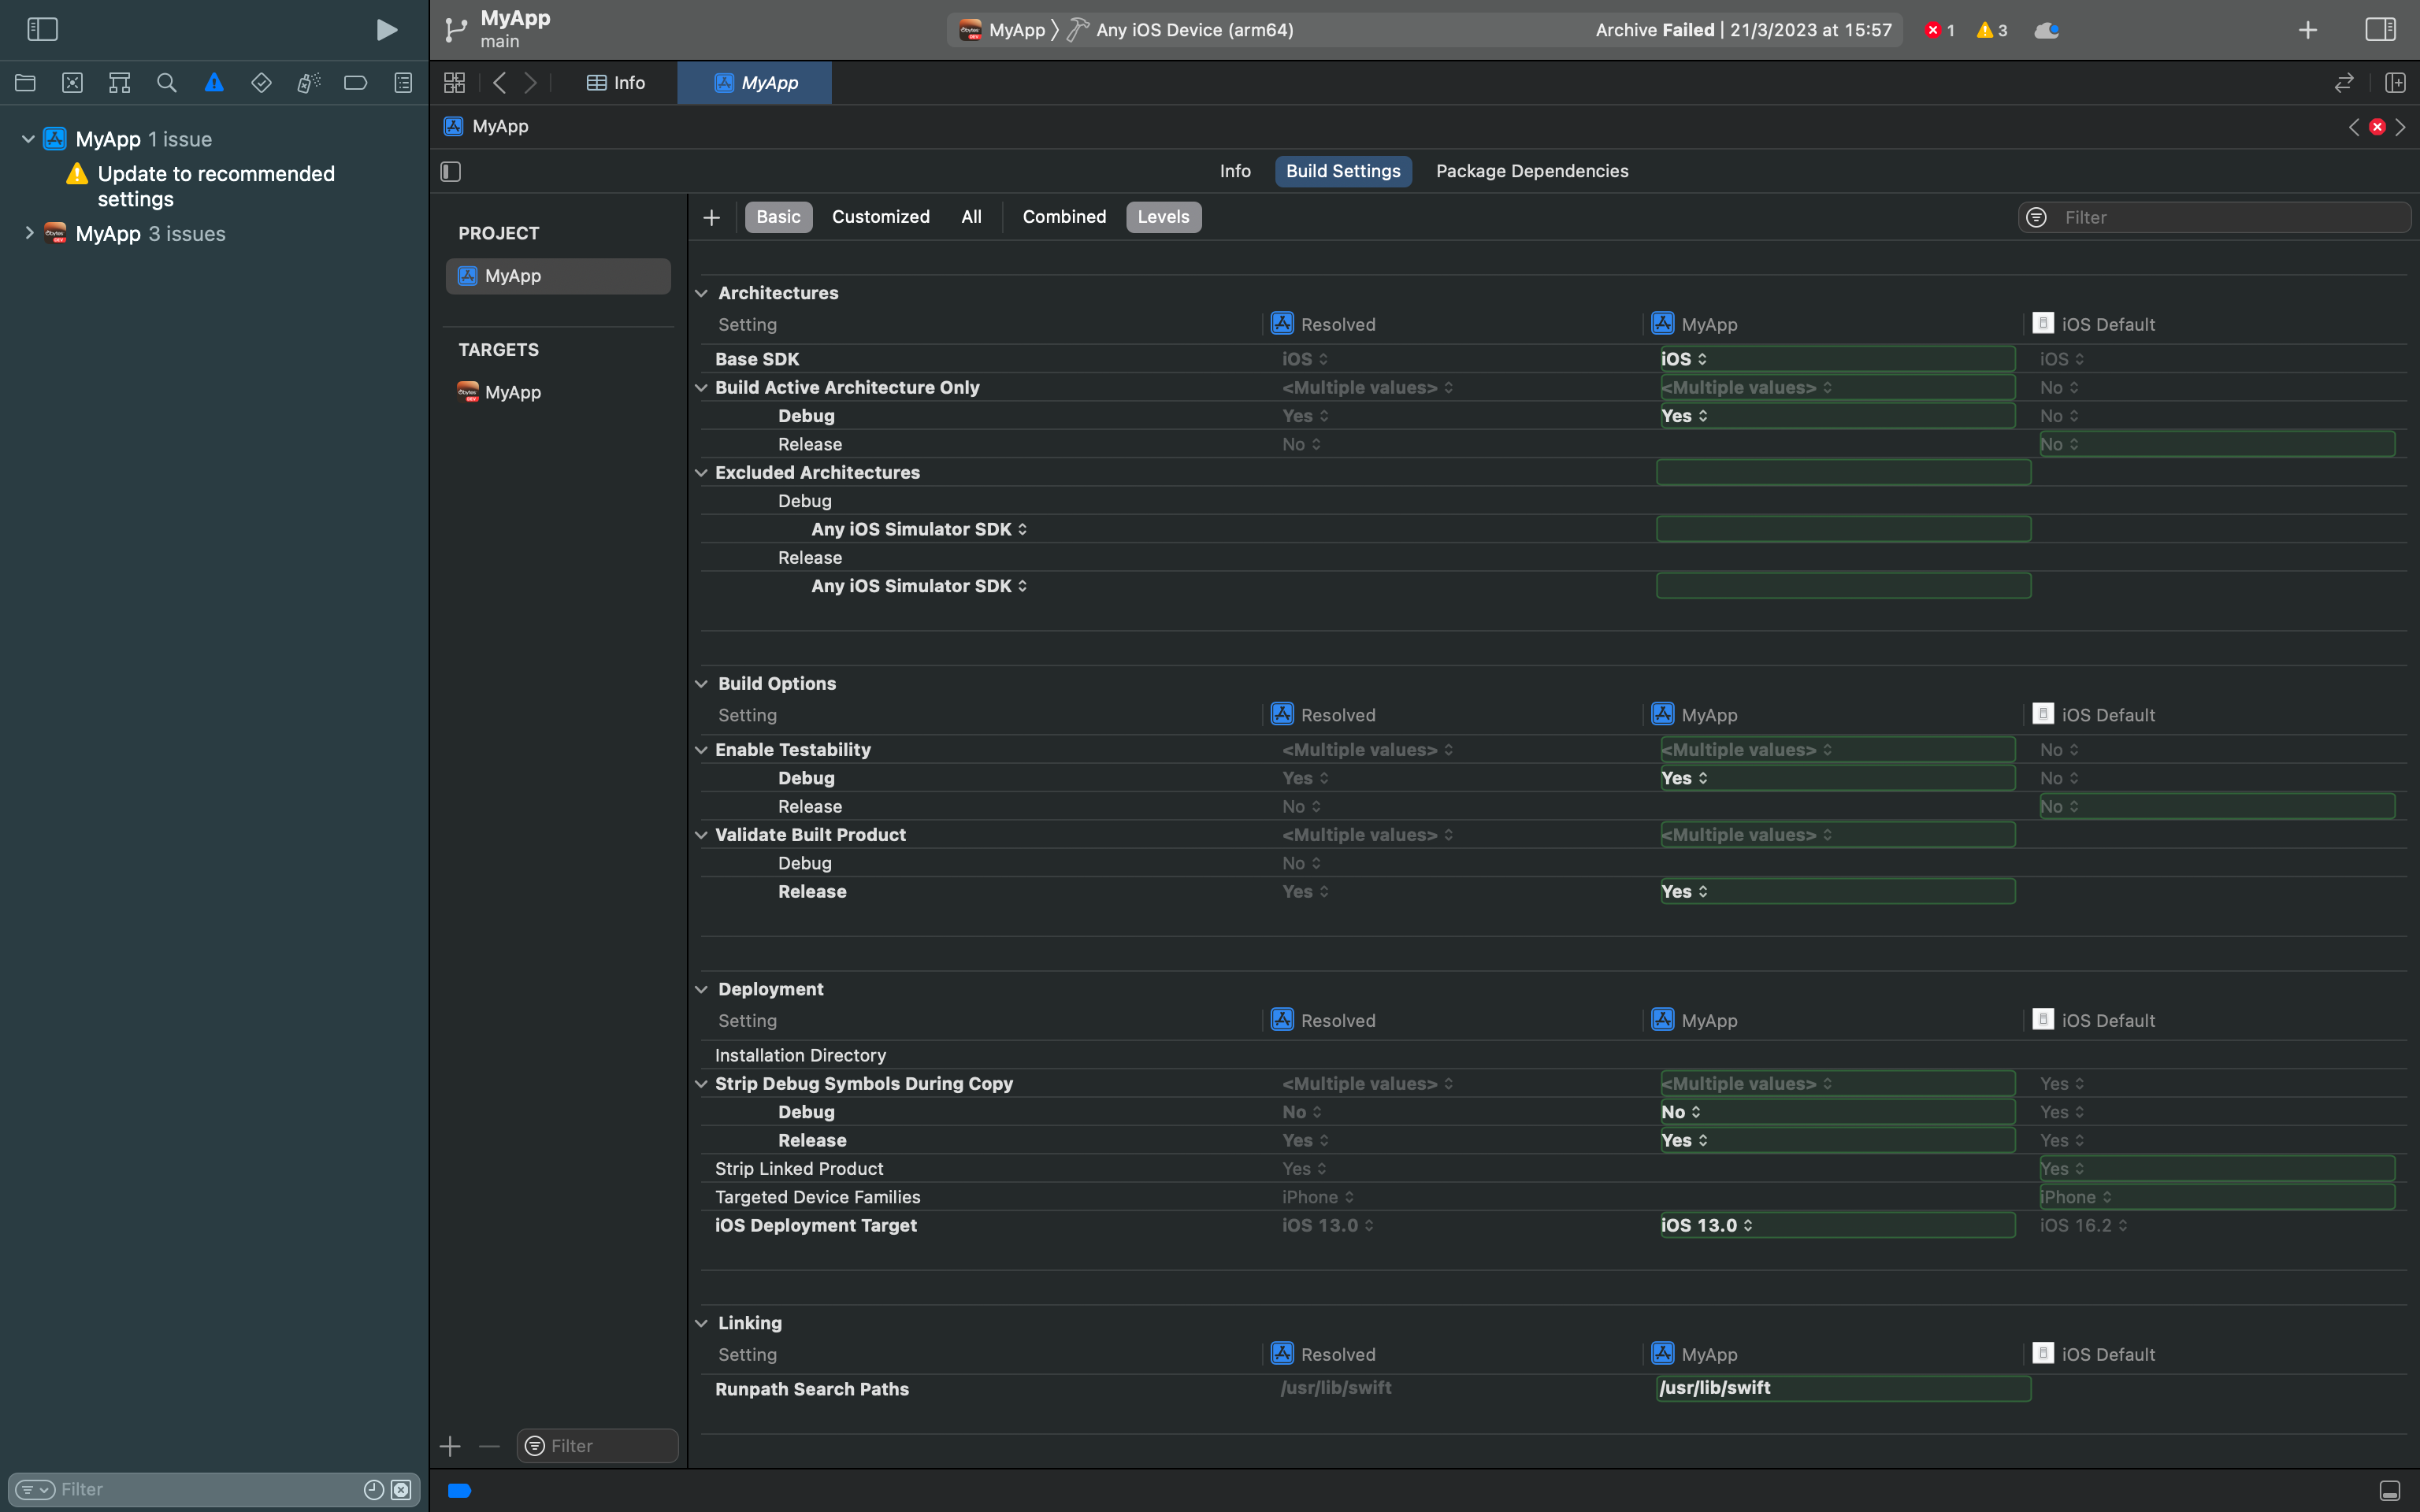
Build settings can be found on the level of the project or the target, Project build settings can be found in the build settings tab in the project navigator, and target build settings can be found in the build settings tab in the target navigator.
But what is a target you may say ?
- Targets
In Xcode, a target is a specified build configuration for a project. It defines a set of instructions and settings to build a specific product, such as an app, library, or framework. Targets also specify the dependencies on other targets, source files, and resources required to build the product. Xcode projects can have multiple targets, each with its own settings and build phases.
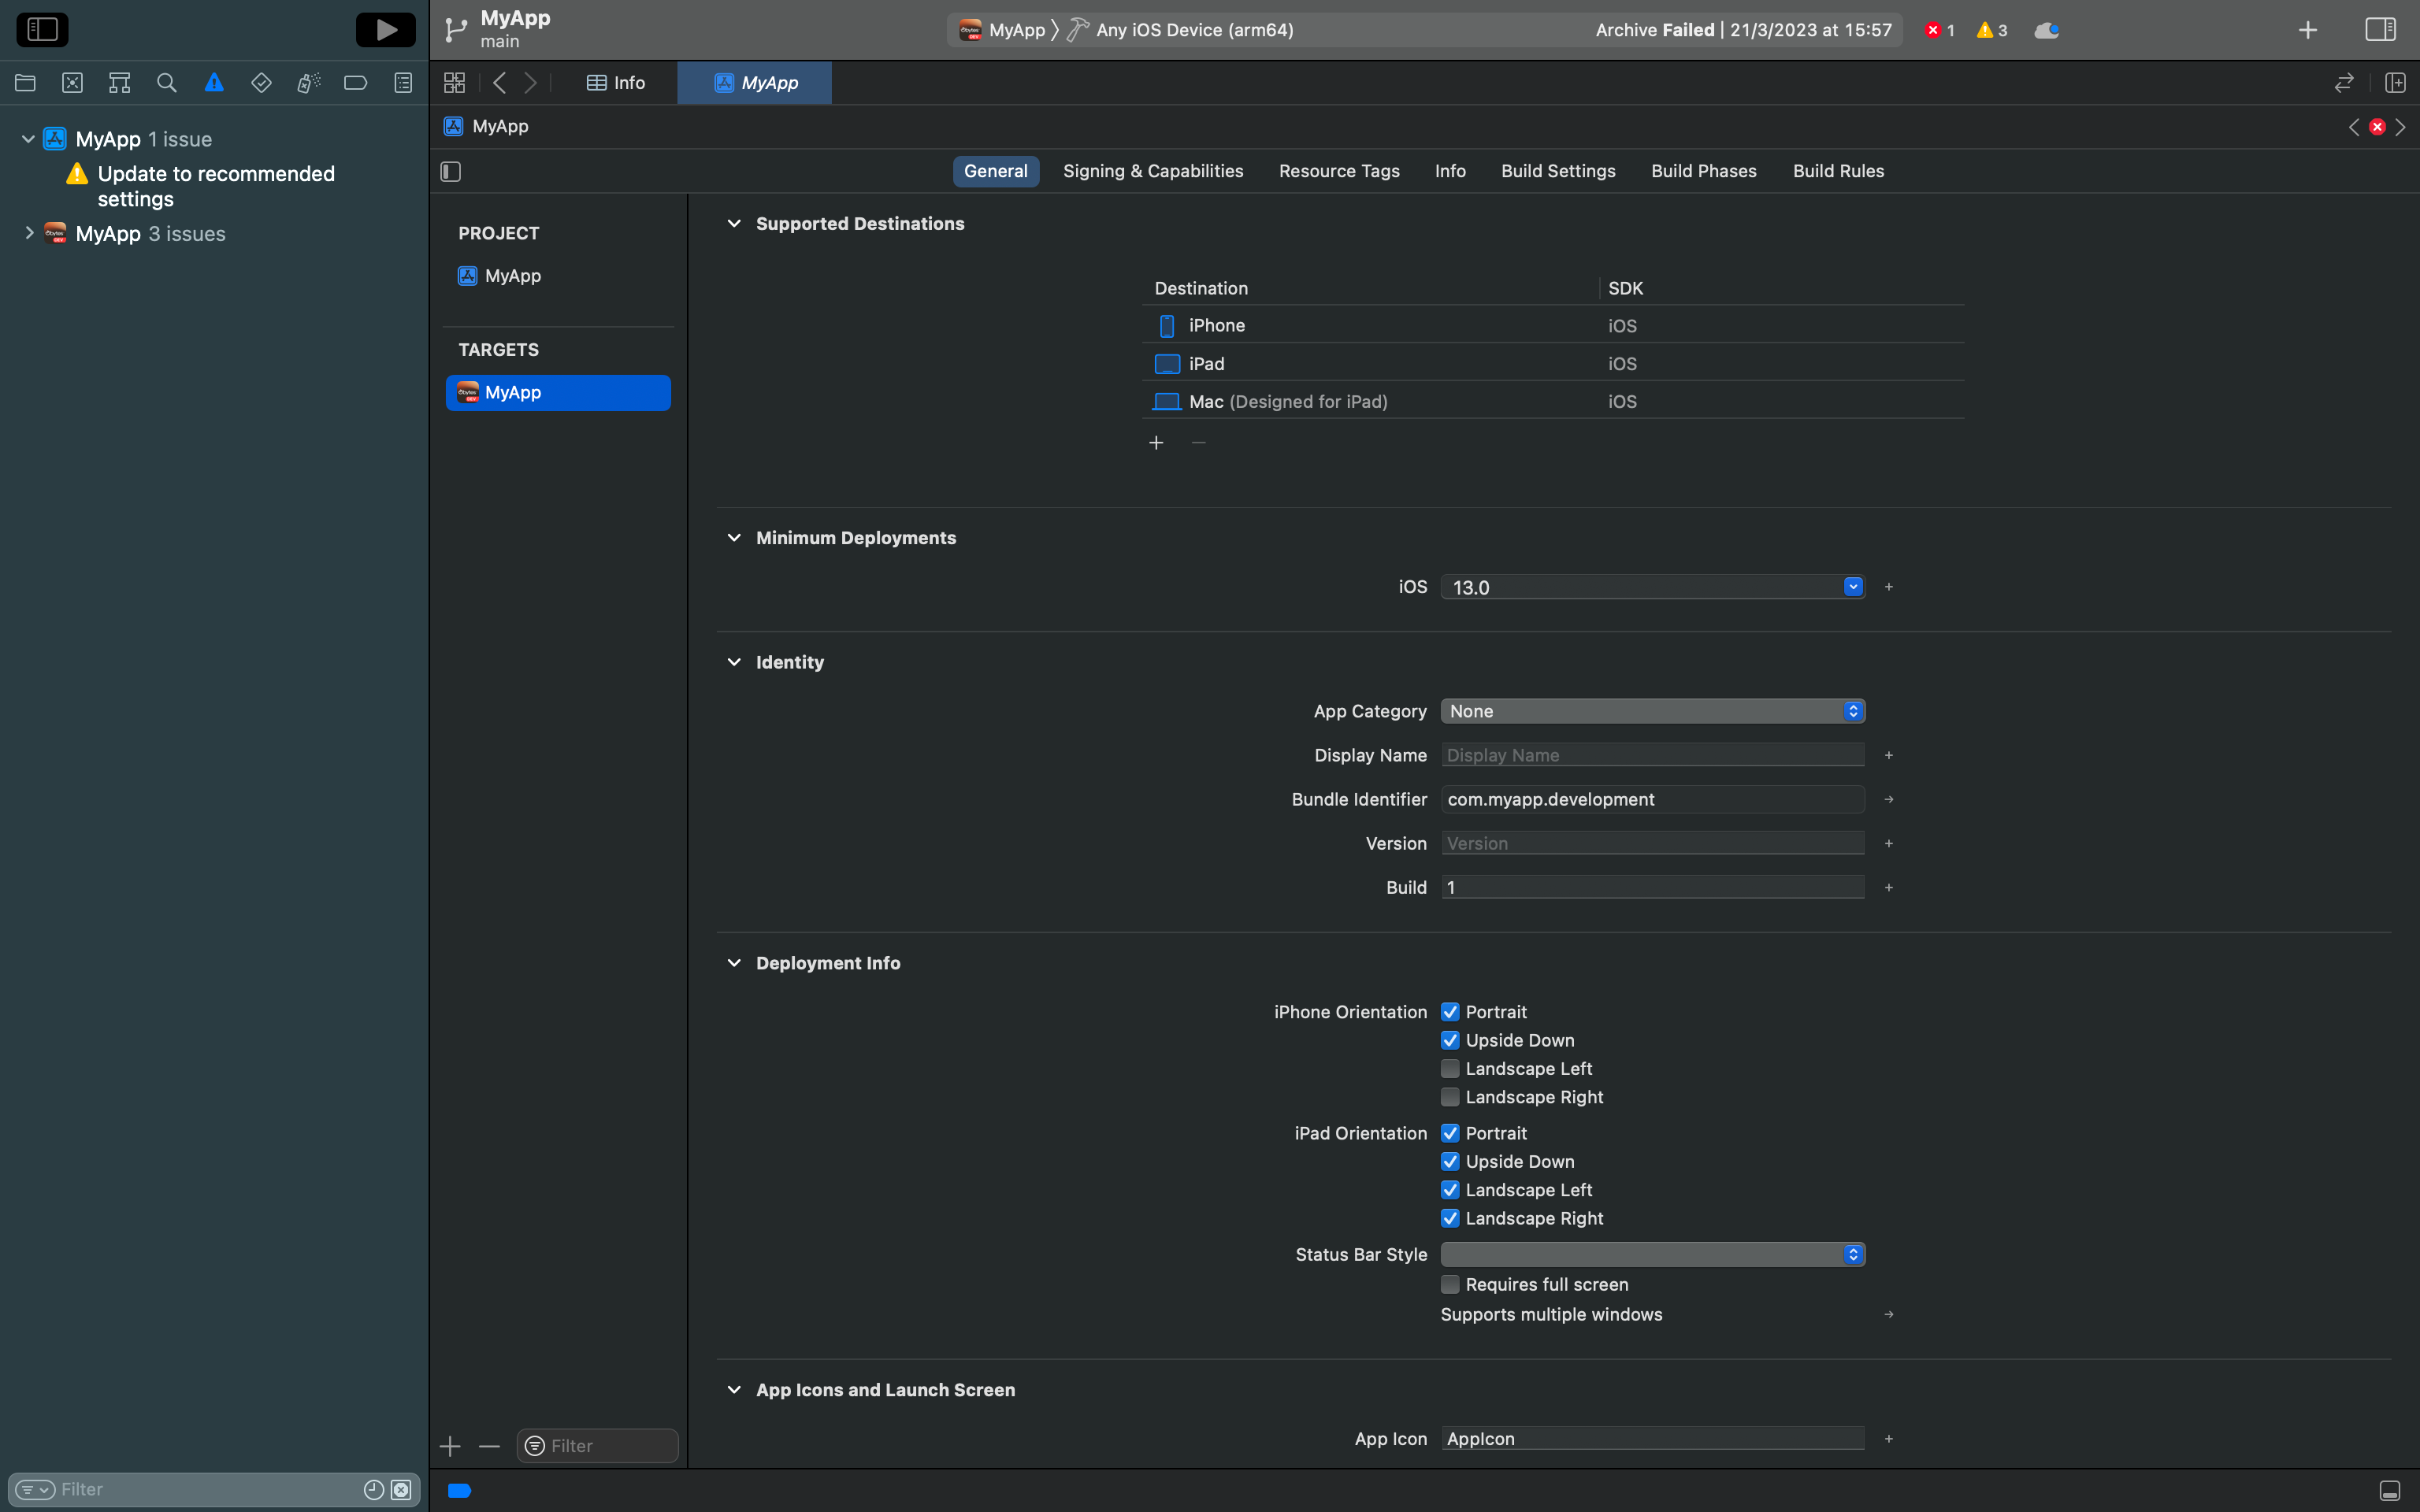
When you click on targets, you will see a list of targets, each target has a name, a product name, a product type, and a bundle identifier.
You can define different build identifiers for each target, for example, you can have a debug build identifier for your debug target, and a release build identifier for your release target, this is useful when you want to test your app on a real device, because you can't install two apps with the same bundle identifier on the same device.
You can also see another tab for Signing & Capabilities, this is where you can define the signing and provisioning profiles for your app, we will talk about that in the last section.
Sometimes as developers we would rather edit a file than using a user interface, let's assume you wanna change the app name directly by editing a file, how would you do that ?
Info.plist
Information Property List is a key-value pair file , it is used to store information that can be easily accessed by your bundle.
Some of the values we saw in Xcode are stored in this file like the app name, the bundle identifier.
Here is an example of an Info.plist, as you can see, it is just an xml file.
<?xml version="1.0" encoding="UTF-8"?>
<!DOCTYPE plist PUBLIC "-//Apple//DTD PLIST 1.0//EN" "http://www.apple.com/DTDs/PropertyList-1.0.dtd">
<plist version="1.0">
  <dict>
    <key>CFBundleDevelopmentRegion</key>
    <string>$(DEVELOPMENT_LANGUAGE)</string>
    <key>CFBundleDisplayName</key>
    <string>MyApp</string>
    <key>CFBundleExecutable</key>
    <string>$(EXECUTABLE_NAME)</string>
    <key>CFBundleIdentifier</key>
    <string>$(PRODUCT_BUNDLE_IDENTIFIER)</string>
    <key>CFBundleInfoDictionaryVersion</key>
    <string>6.0</string>
    <key>CFBundleName</key>
    <string>$(PRODUCT_NAME)</string>
    <key>CFBundlePackageType</key>
    <string>$(PRODUCT_BUNDLE_PACKAGE_TYPE)</string>
    <key>CFBundleShortVersionString</key>
    <string>0.0.1</string>
    <key>CFBundleSignature</key>
    <string>????</string>
    <key>CFBundleURLTypes</key>
    <array>
      <dict>
        <key>CFBundleURLSchemes</key>
        <array>
          <string>com.myapp.development</string>
        </array>
      </dict>
      <dict>
        <key>CFBundleURLSchemes</key>
        <array>
          <string>exp+obytesapp</string>
        </array>
      </dict>
    </array>
    <key>CFBundleVersion</key>
    <string>1</string>
    <key>LSRequiresIPhoneOS</key>
    <true/>
    <key>NSAppTransportSecurity</key>
    <dict>
      <key>NSAllowsArbitraryLoads</key>
      <true/>
      <key>NSExceptionDomains</key>
      <dict>
        <key>localhost</key>
        <dict>
          <key>NSExceptionAllowsInsecureHTTPLoads</key>
          <true/>
        </dict>
      </dict>
    </dict>
    <key>UIAppFonts</key>
    <array>
      <string>Inter.ttf</string>
    </array>
    <key>UILaunchStoryboardName</key>
    <string>SplashScreen</string>
    <key>UIRequiredDeviceCapabilities</key>
    <array>
      <string>armv7</string>
    </array>
    <key>UIRequiresFullScreen</key>
    <false/>
    <key>UIStatusBarStyle</key>
    <string>UIStatusBarStyleDefault</string>
    <key>UISupportedInterfaceOrientations</key>
    <array>
      <string>UIInterfaceOrientationPortrait</string>
      <string>UIInterfaceOrientationPortraitUpsideDown</string>
    </array>
    <key>UISupportedInterfaceOrientations~ipad</key>
    <array>
      <string>UIInterfaceOrientationPortrait</string>
      <string>UIInterfaceOrientationPortraitUpsideDown</string>
      <string>UIInterfaceOrientationLandscapeLeft</string>
      <string>UIInterfaceOrientationLandscapeRight</string>
    </array>
    <key>UIUserInterfaceStyle</key>
    <string>Light</string>
    <key>UIViewControllerBasedStatusBarAppearance</key>
    <false/>
  </dict>
</plist>
We notice several other values are stored in info.plist like bundle version, App fonts, supported orientations, bundle version, bundle short version and many more.
You may be wondering what is the difference between bundle version and bundle short version, the bundle version is the build number, it is incremented every time you build your app, the bundle short version is the version number of your app, it is incremented every time you release a new version of your app.
One of most common way you would interact with this file would be when adding permissions to your application, in order to do that you can edit your file directly from your preferred editor (aka vscode).
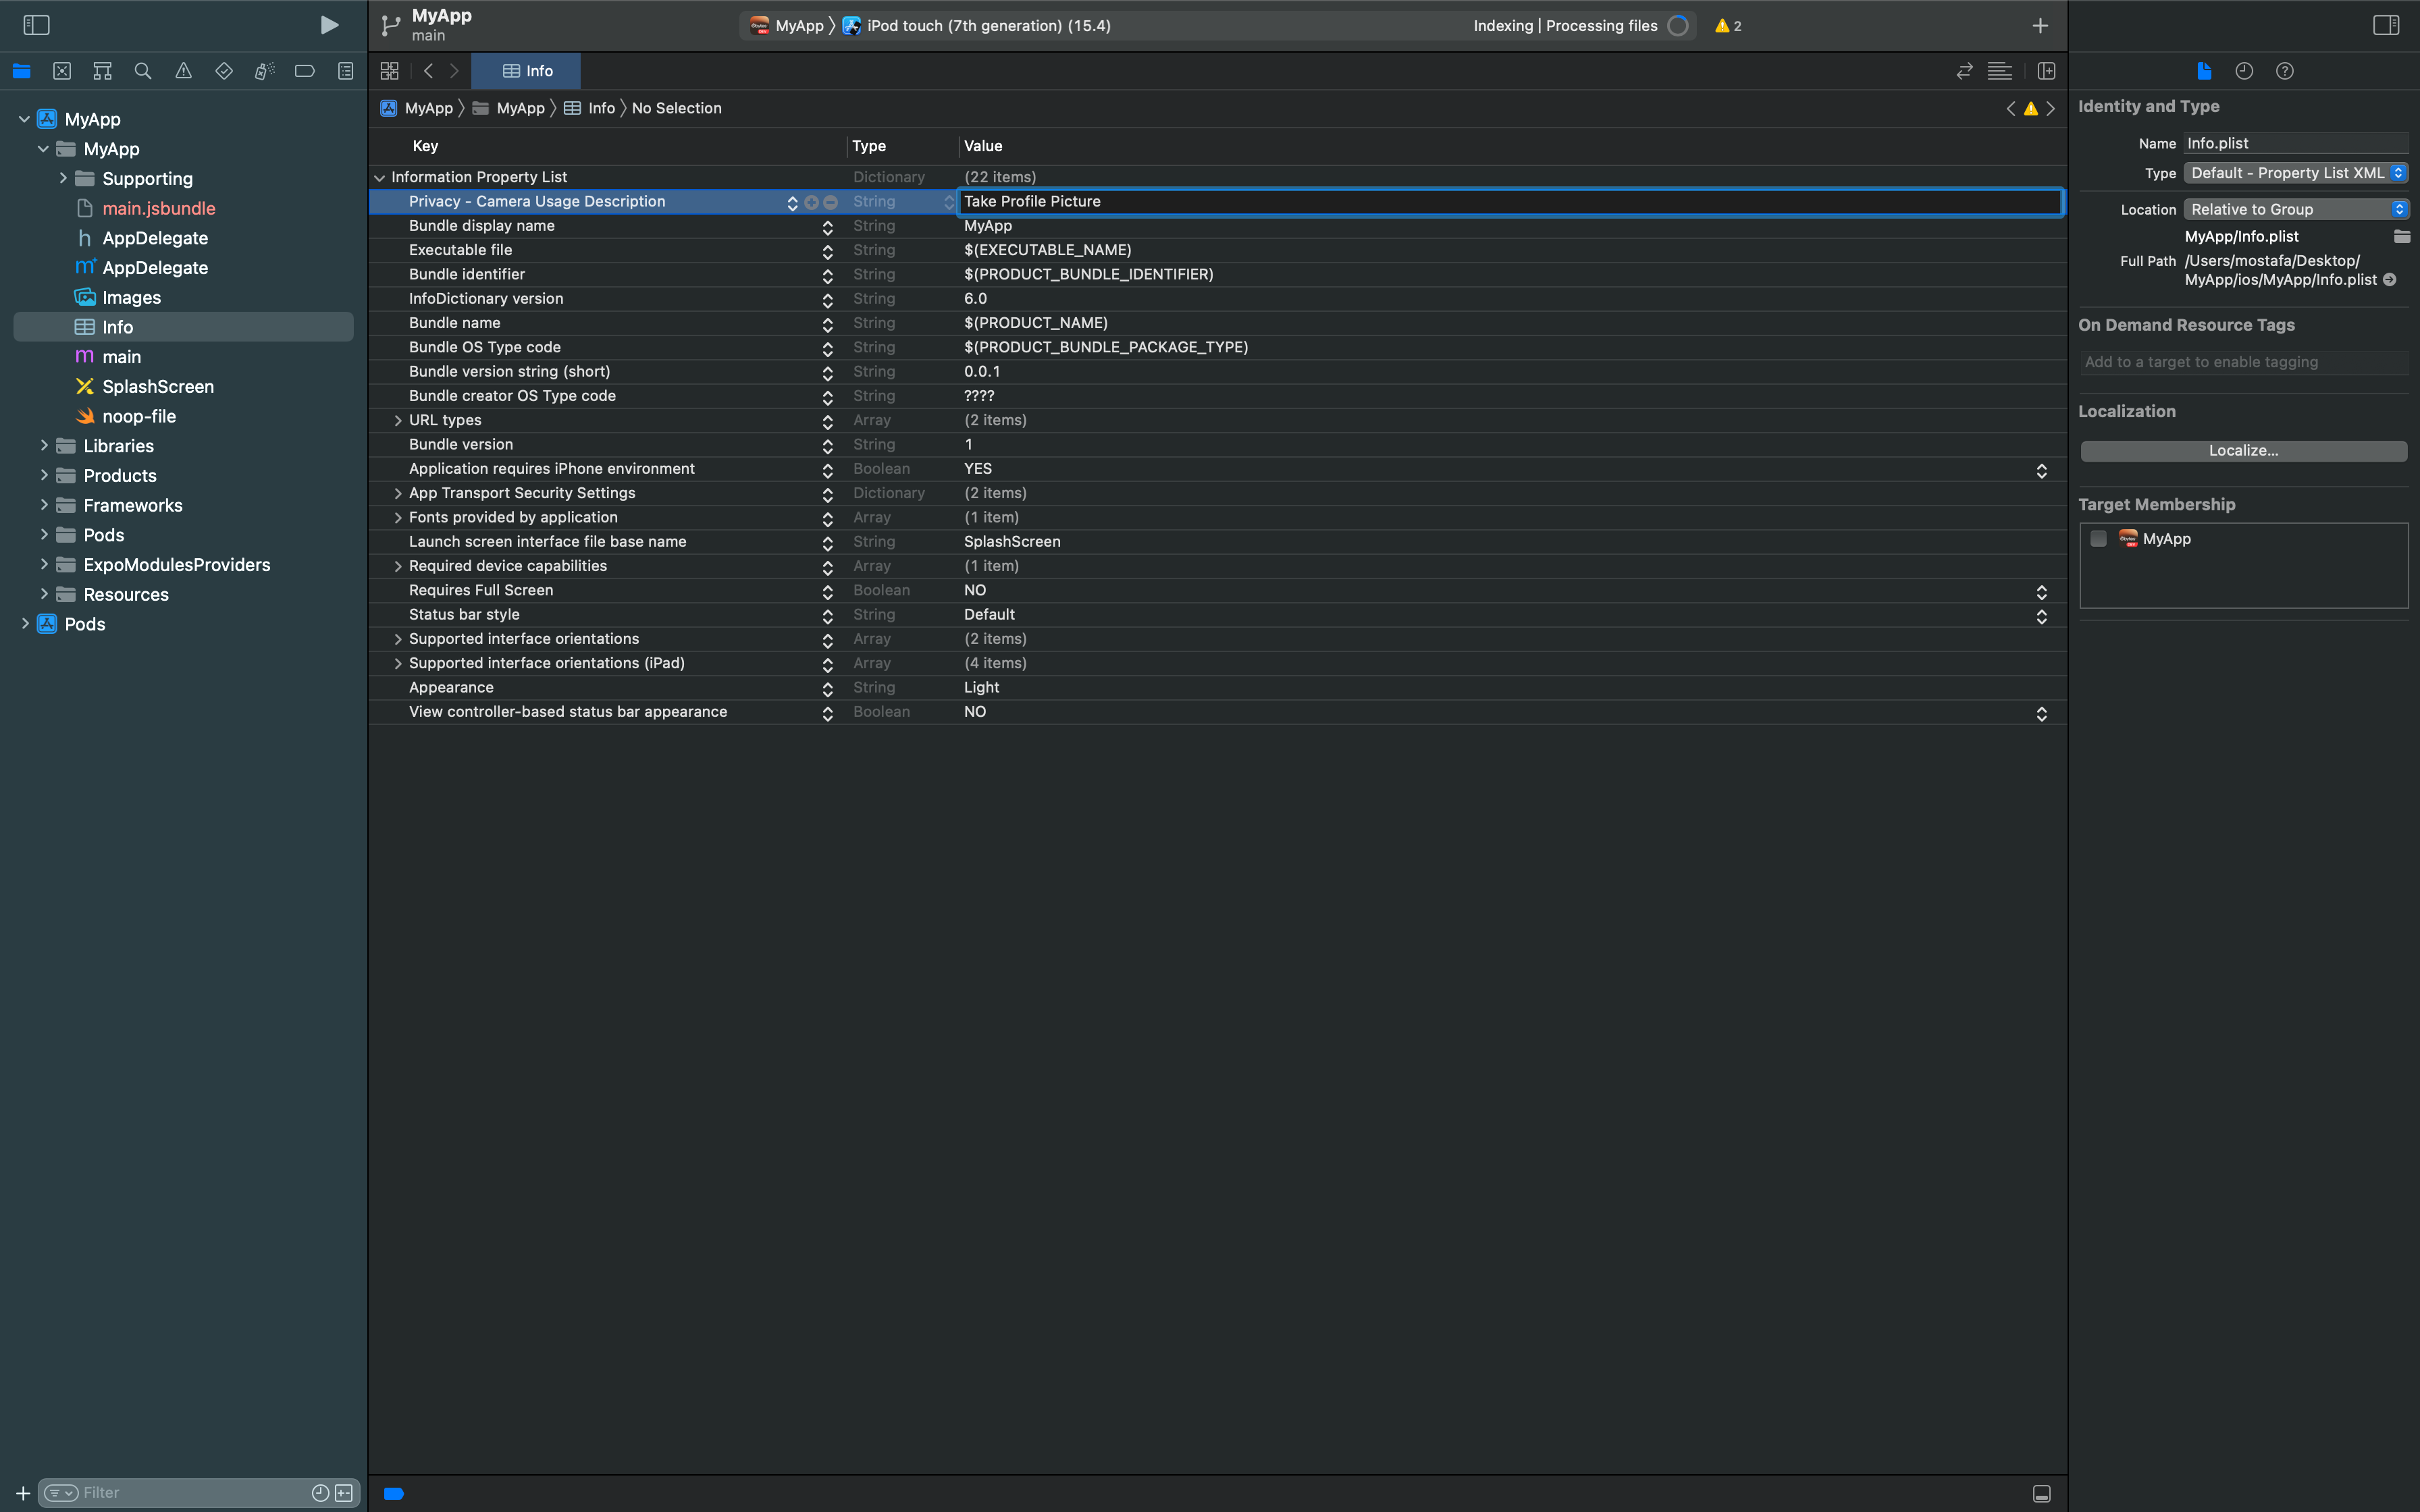
For example, if you want to add the camera permission, you can add the following line to your info.plist
<key>NSCameraUsageDescription</key>
<string>Used to take profile picture</string>
You can also do the same thing from Xcode following these steps:
1- Open Info.plist and click on the (+) button on the top
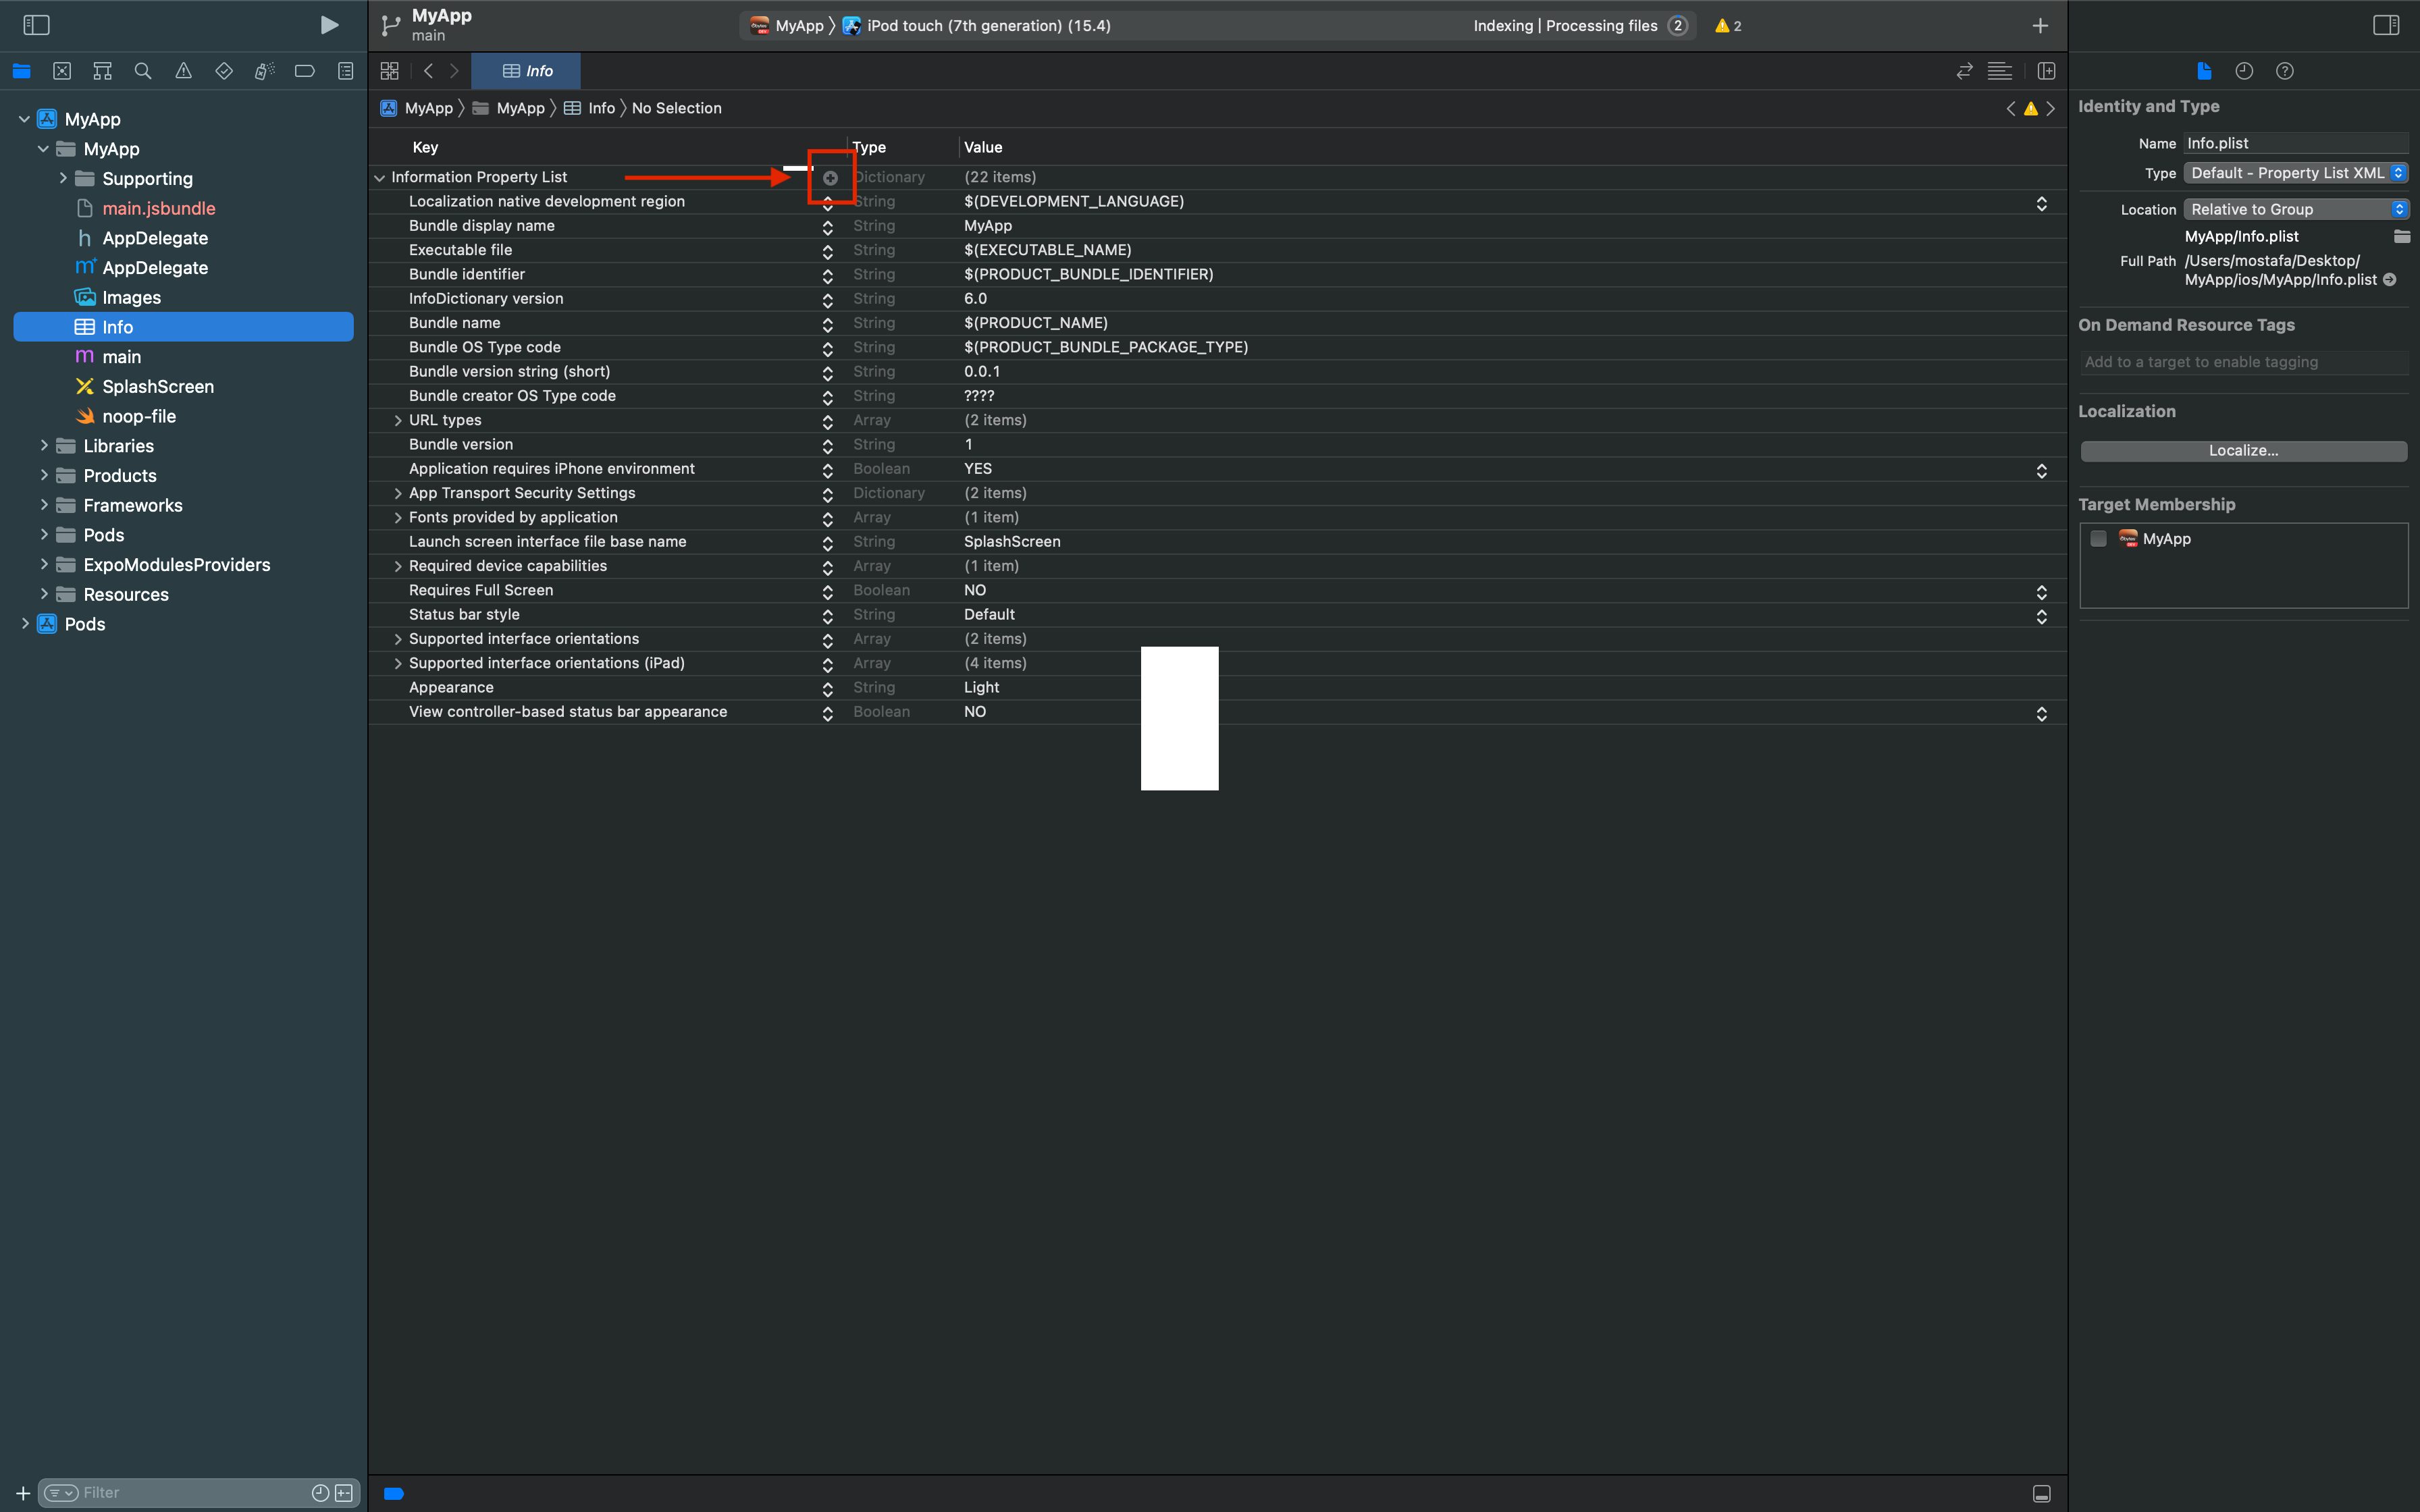
2- You will see a list of all possible value
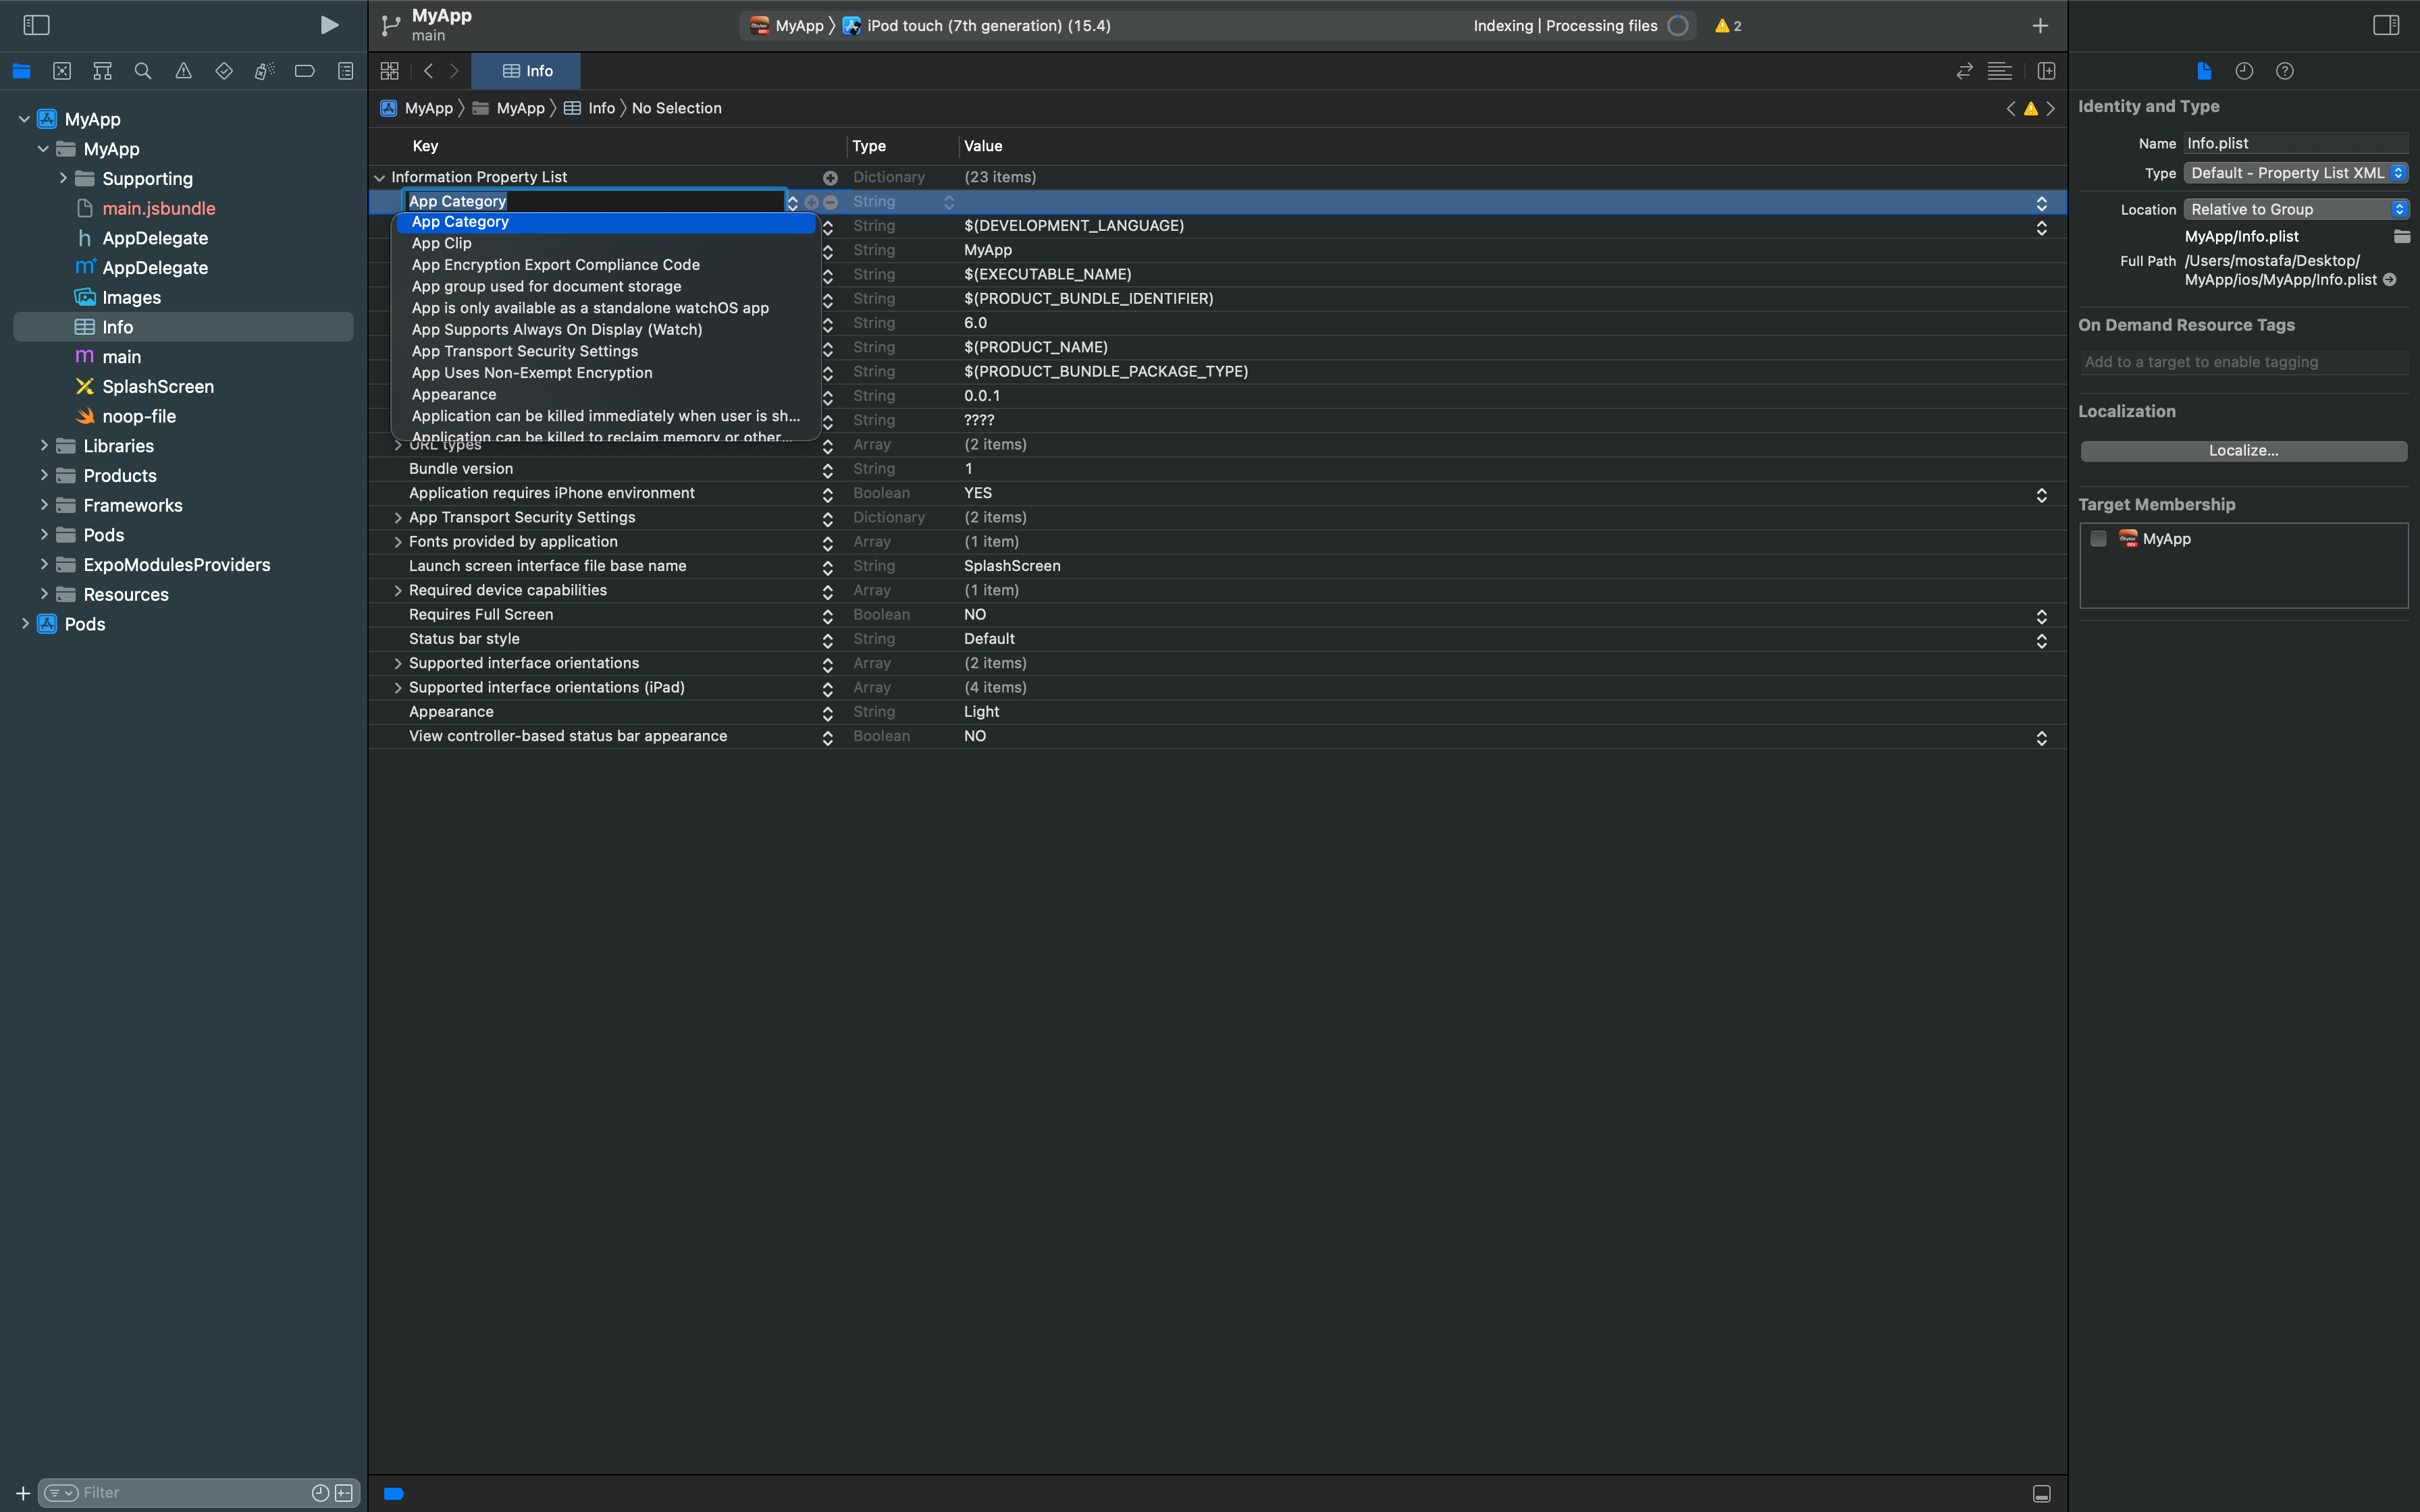
3- Choose the wanted permission and add a text that describe why you need access to that feature
- Archiving and publishing your app
Now that you have finished developing your app, it is time to publish it, but before that you need to archive it.
You remember Signing & Capabilities section in Xcode, it is right here where it comes into play.
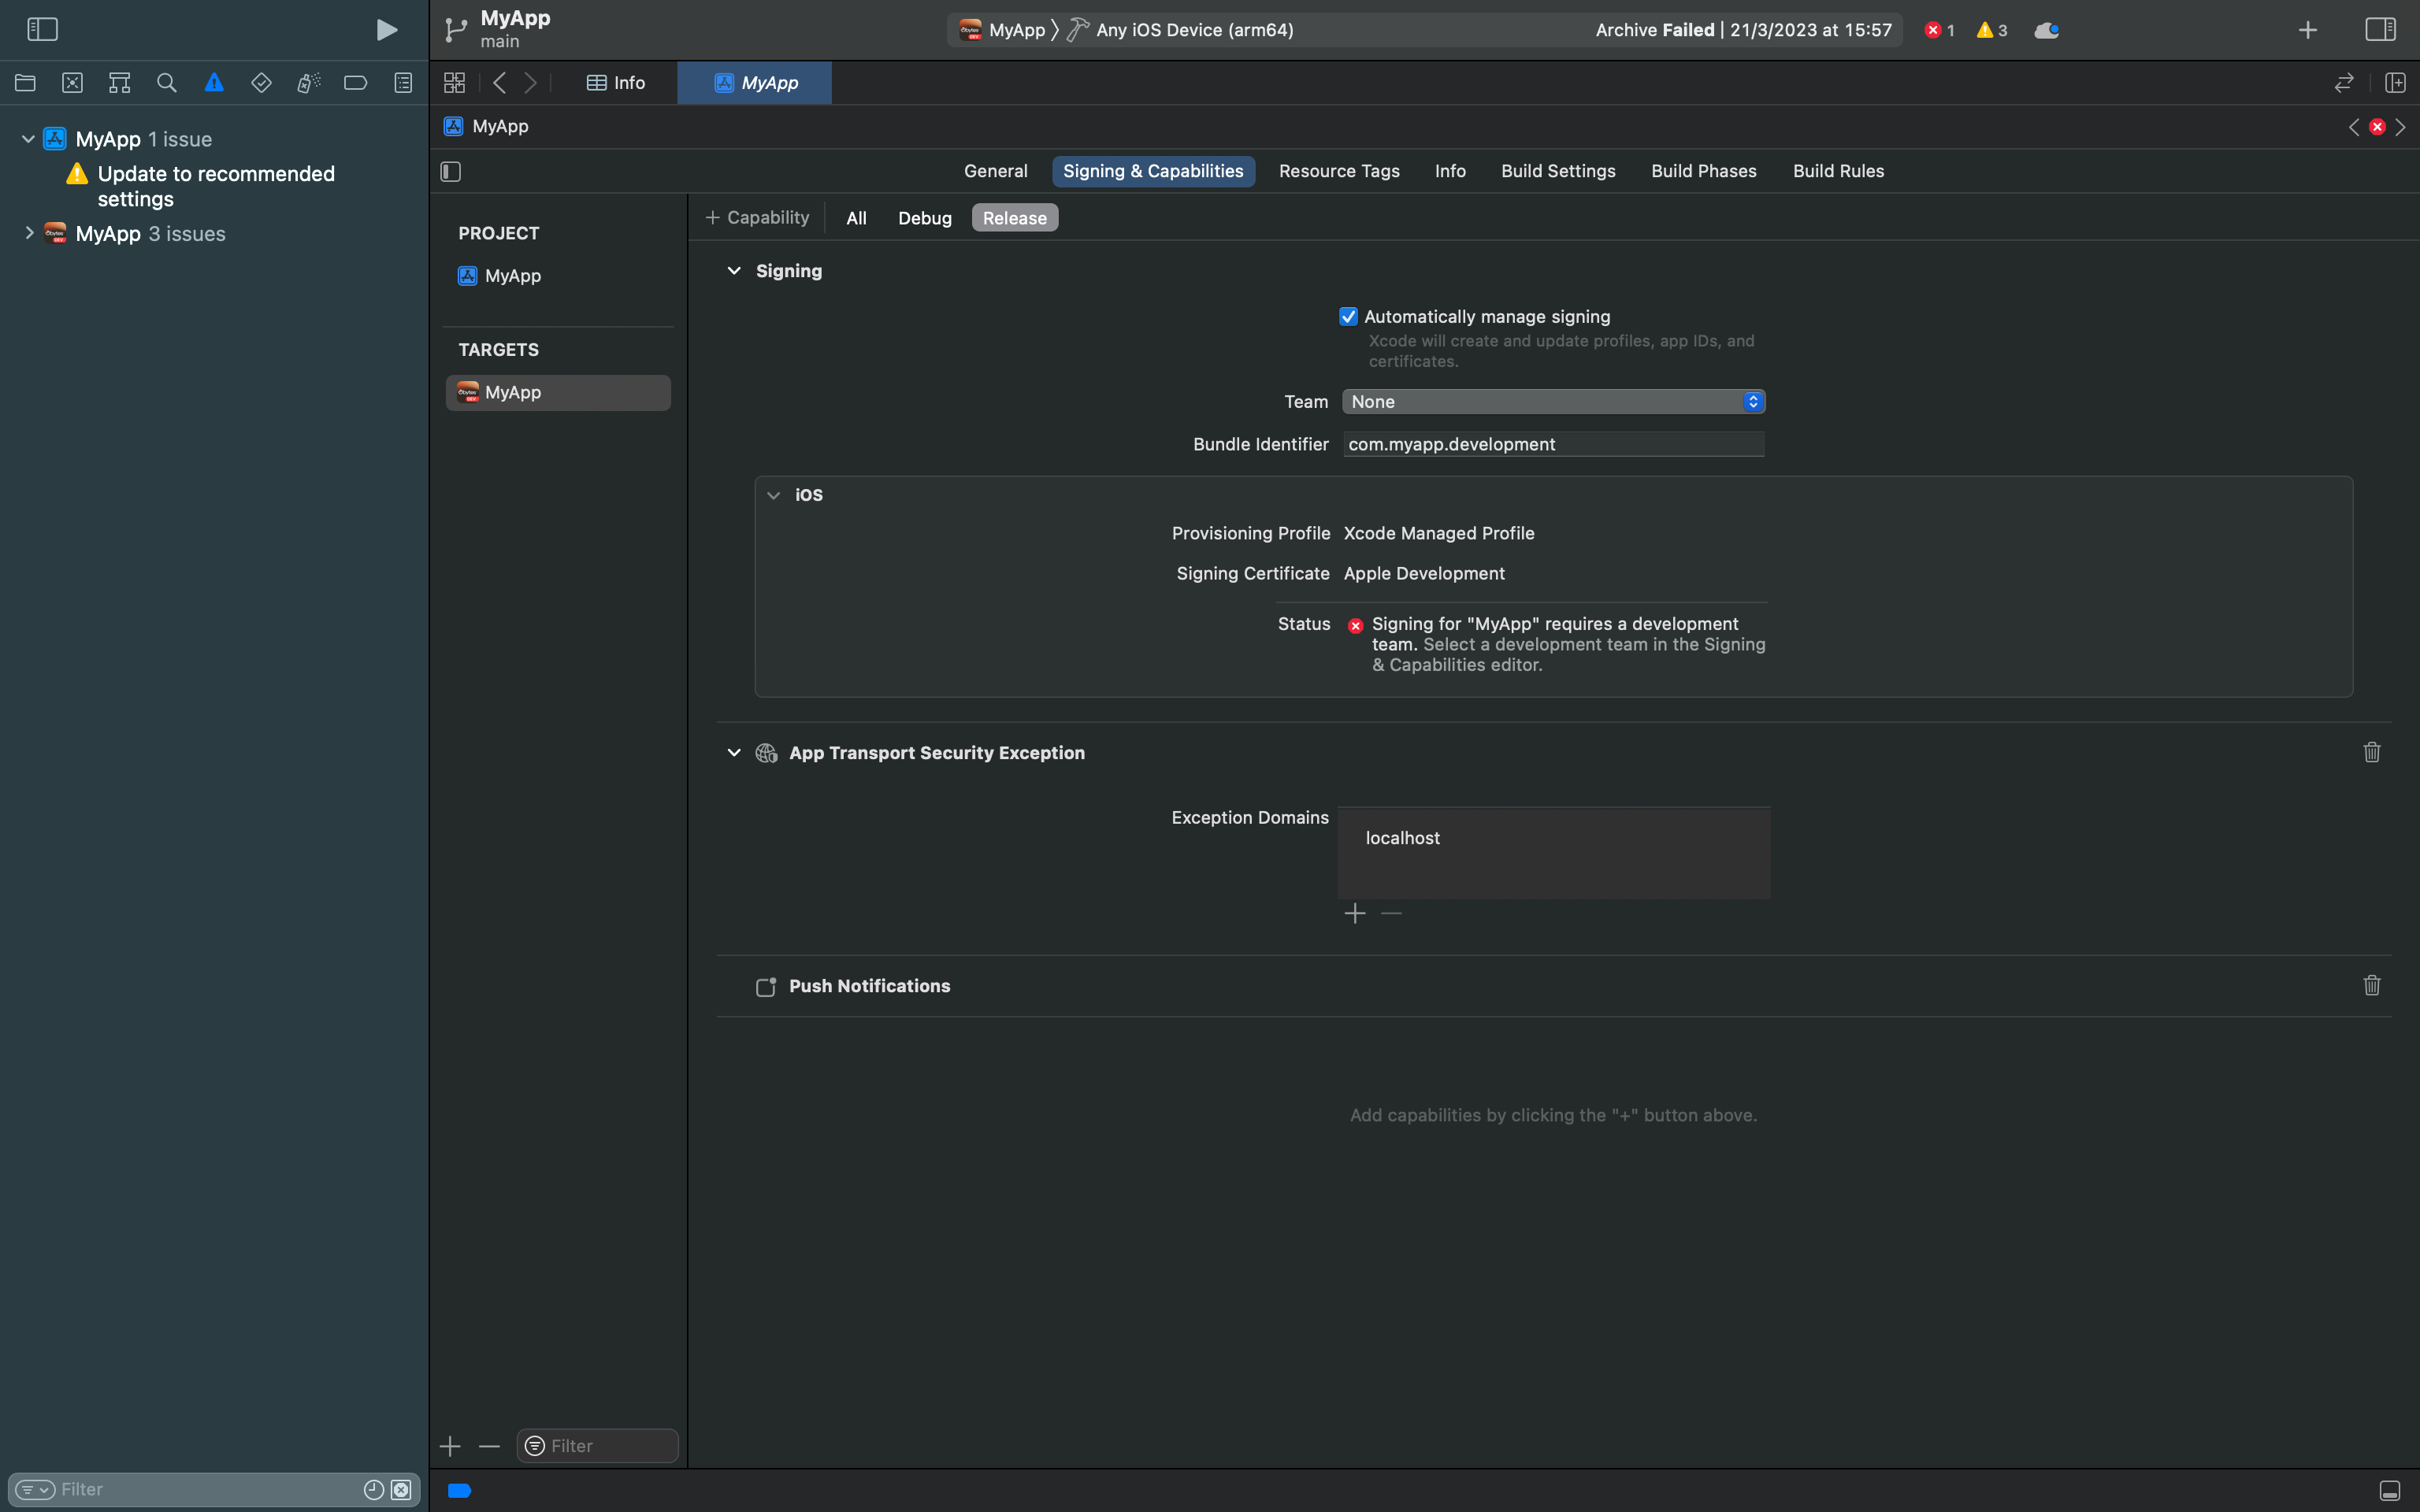
A certificate is a file that is used to sign your app, and a provisioning profile is a file that is used to identify your app and the devices that can run it.
In order to create a certificate and a provisioning profile, you can follow this guide
Once you have created your certificate and your provisioning profile, added them Signing & Capabilities, you can archive your app by following these steps:
1- Select Product > Archive make sure that Any iOS Device is selected
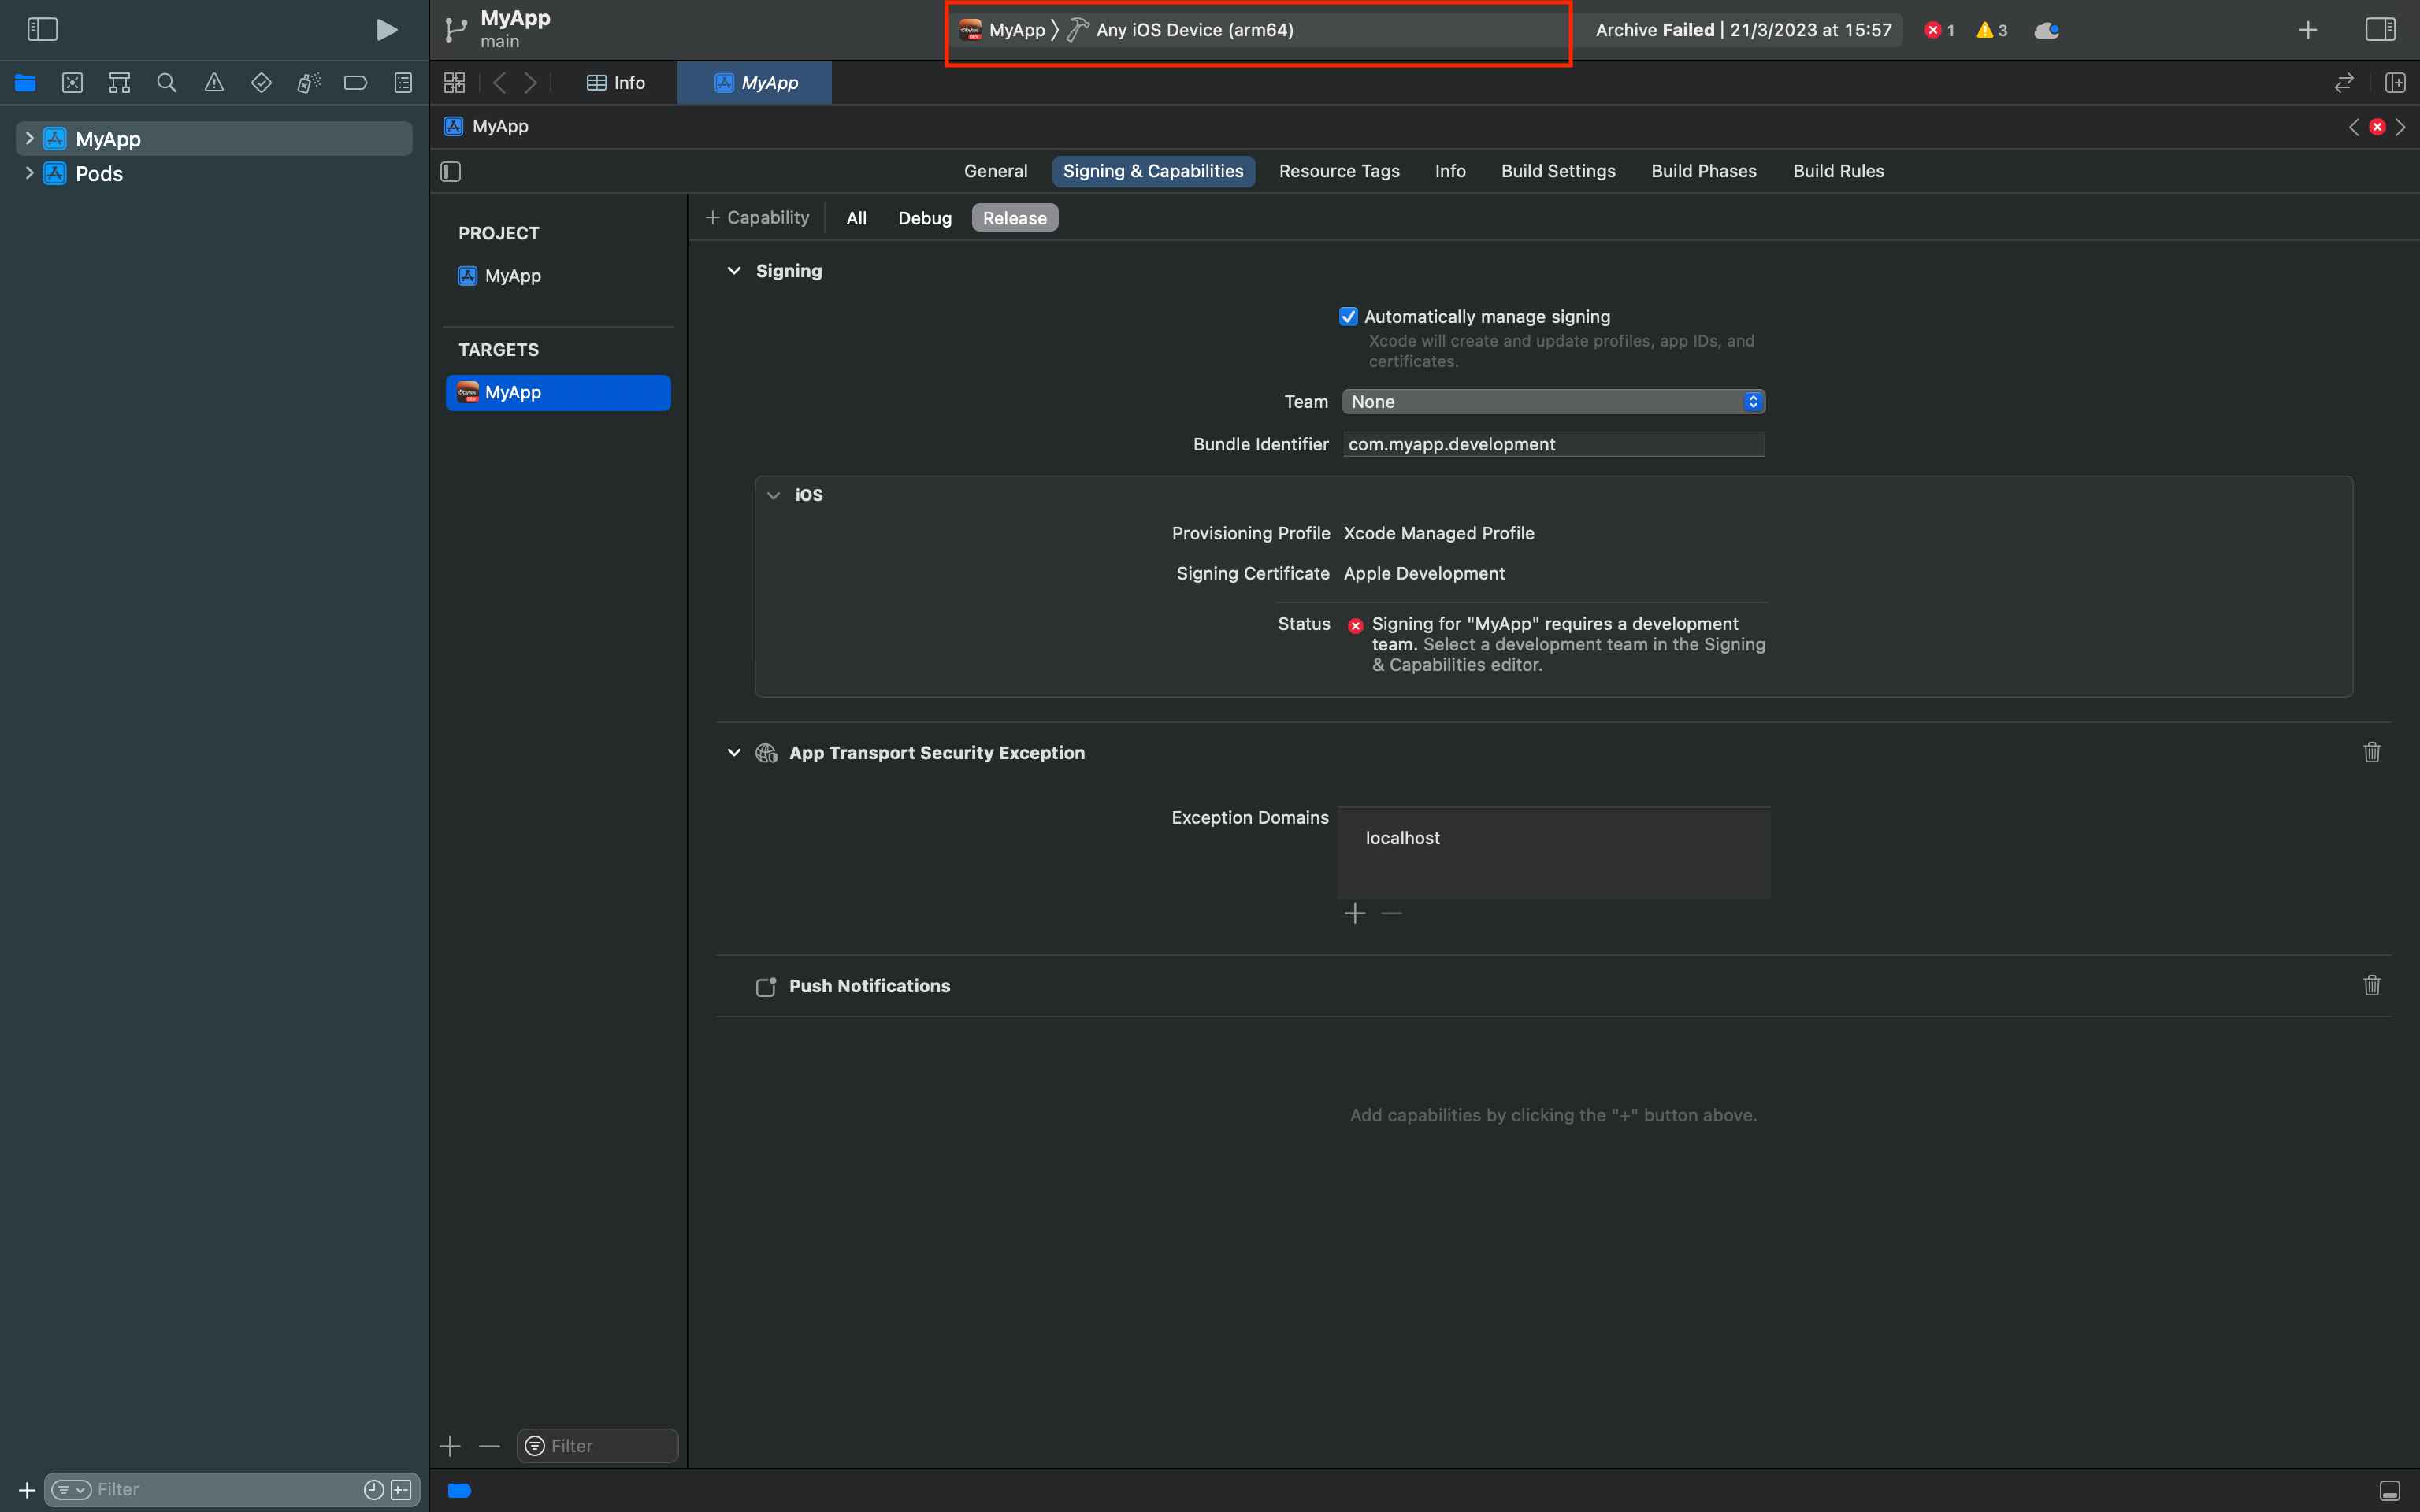
2- Wait for the archive to finish
3- Once the archive is finished, you will see a window like this
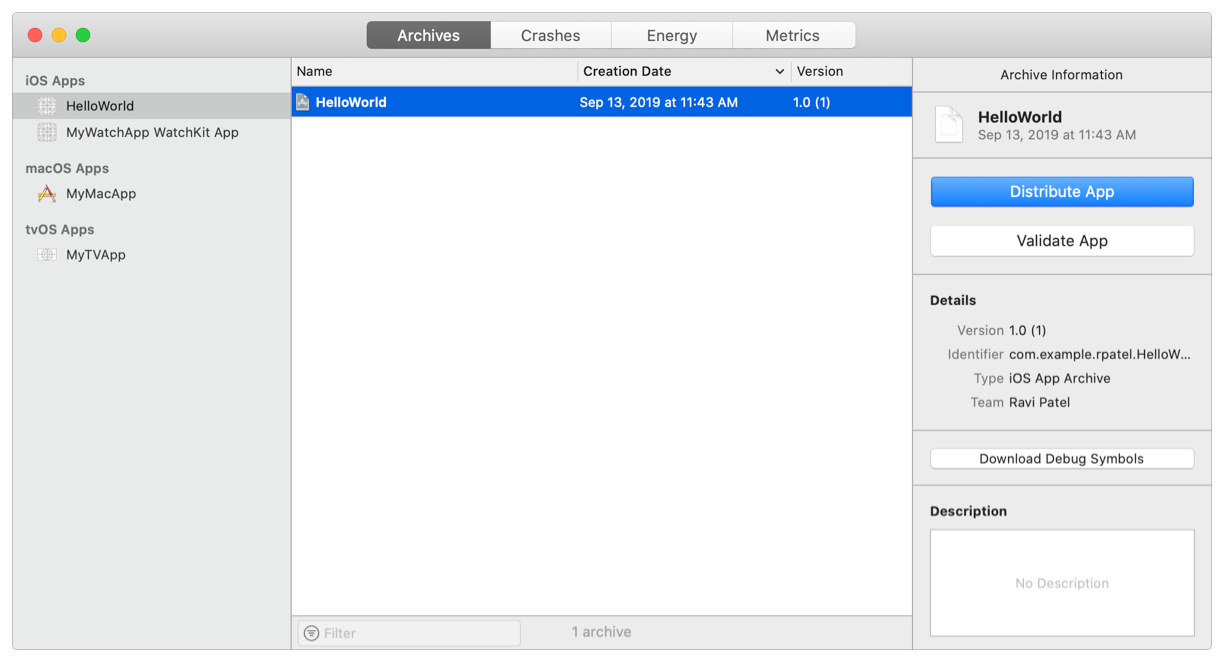
You have successfully archived your app, now you can publish it to the App Store.
Click on the Distribute App button, and follow the steps to publish your app.
Congratulations, you have successfully published your app to the App Store.
This article does not aim to teach you everything about native development, but rather to give you a general idea of what you will be dealing with while developing apps in React Native, it is also the guide that I wish I had when I first started learning React Native.
If you think other people should read this post. Tweet, share and Follow me on Twitter for the next articles.